Top 15 Best Instant Coffees for Backpacking

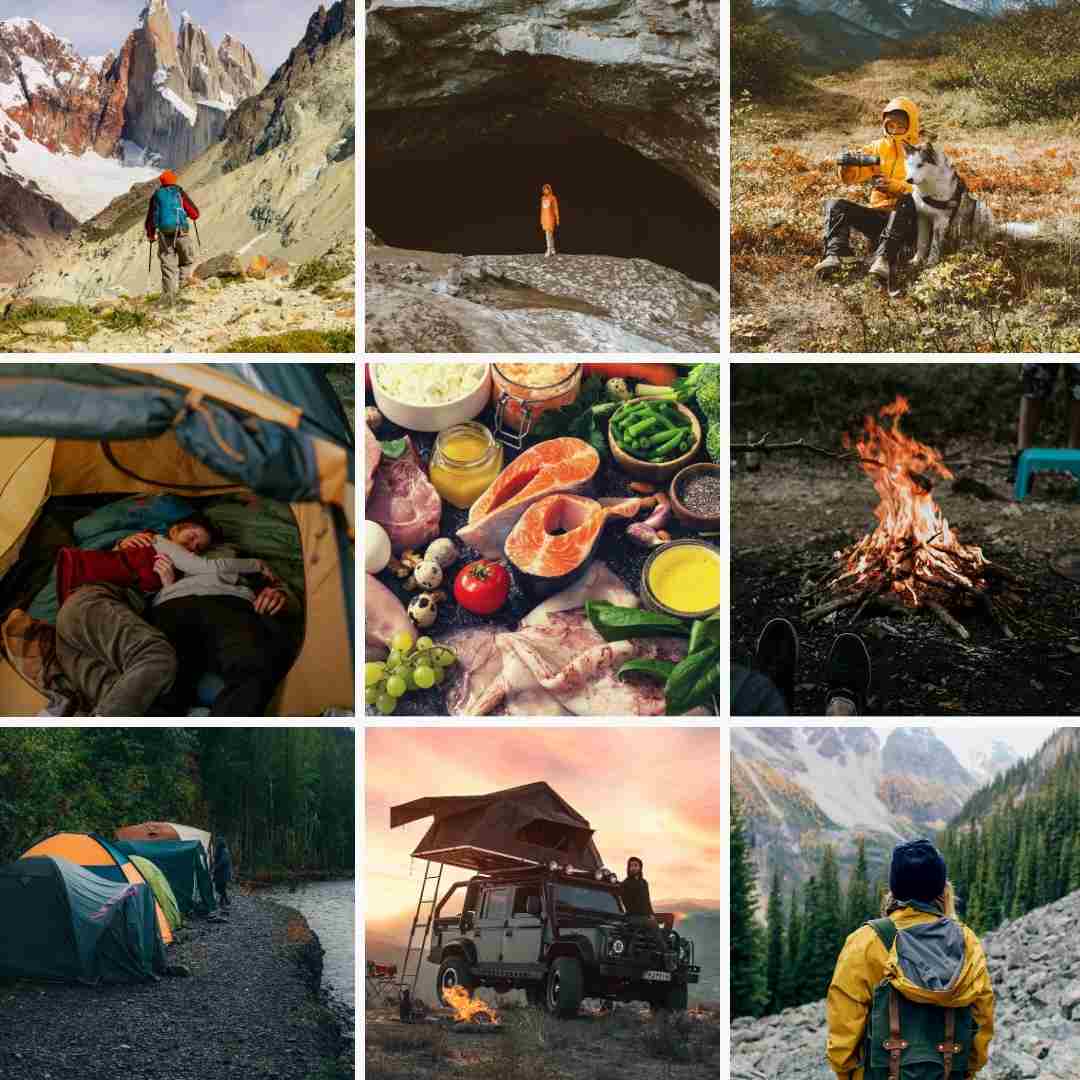
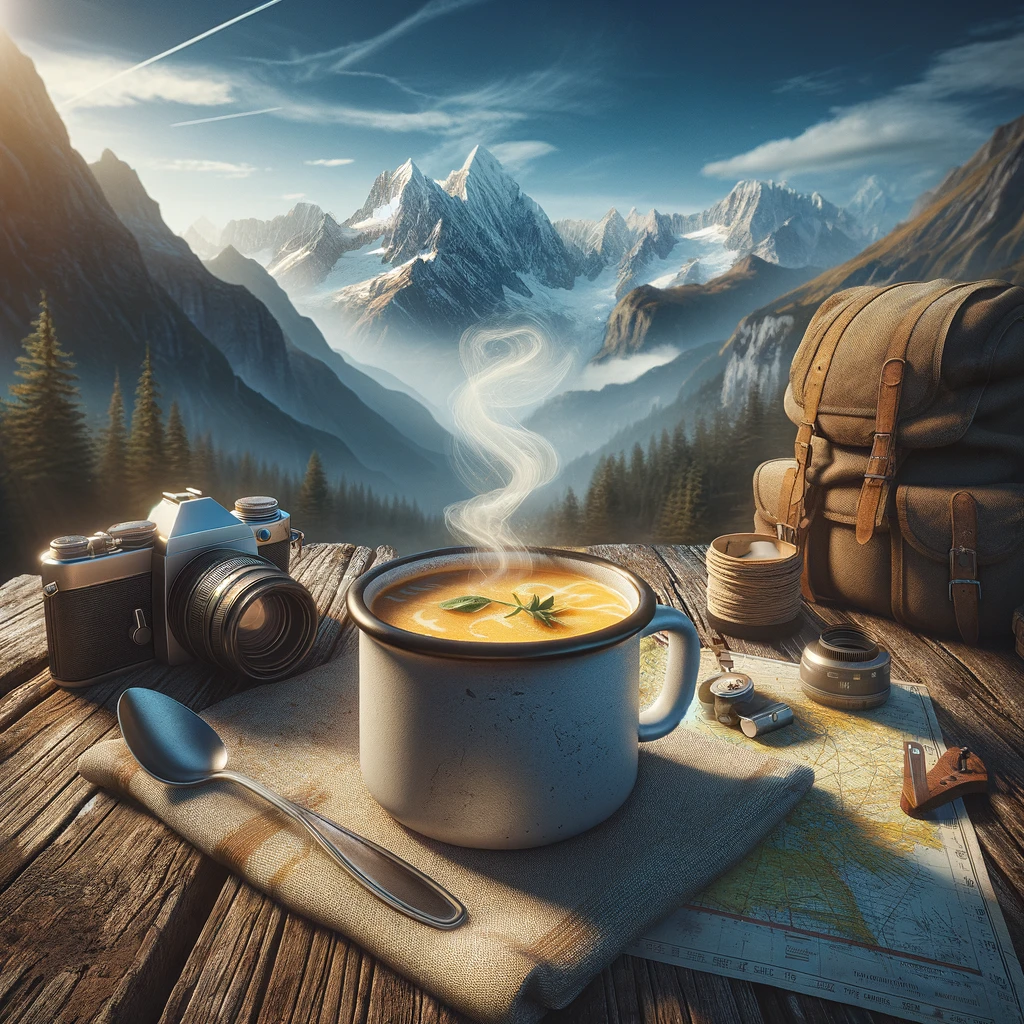
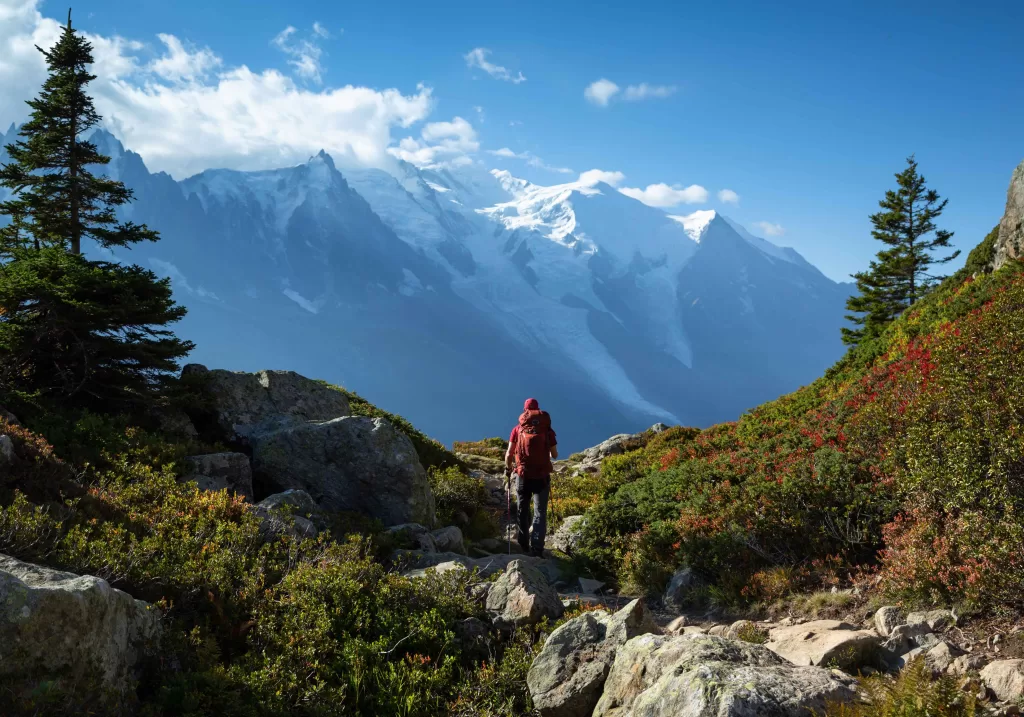
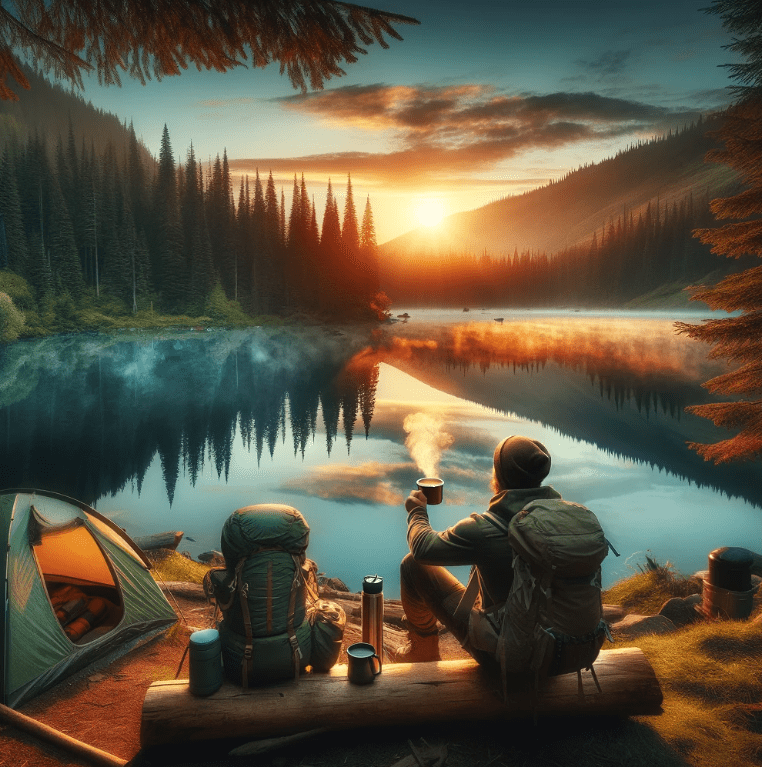
There’s a special kind of magic in savoring a freshly brewed cup of coffee amidst the serenity of the great outdoors. 

In recent years, the quest for the best instant coffee for backpacking has driven me to try all sorts of brands that have energized me on both the Appalachian Trail and those serene mornings in car camping sites. 

I’m always in search of that perfect cup of joe that could rival the coffee shop experience. 

For coffee lovers who refuse to settle for less, here are my top picks that promise to elevate your coffee fix to the next level, satisfying even the most discerning coffee snob.

This post may contain affiliate links, which means I’ll receive a commission if you purchase through my links, at no extra cost to you. Please read my full disclosure here.

1. Mount Hagen 

When it comes to finding the best coffee that can be enjoyed miles away from a coffee shop, Mount Hagen leads the pack. Known for its fair trade and organic coffee beans, this brand offers instant coffee packets that transform hot water into a good cup of coffee that tastes surprisingly close to the real thing. 

Whether you prefer your coffee black or with a splash of soy milk, Mount Hagen delivers a well-balanced cup of coffee that is the best option to please your taste buds without the extra weight of a french press or coffee grounds in your pack.

2. First Ascent Instant Coffee

First Ascent Coffee takes adventure coffee to new heights (puns intended) and is by far one of my favorite instant coffee brands. Tailored for the outdoor enthusiast, their instant coffee offers a robust flavor that echoes the brand’s mountainous roots. The only downside? Deciding which of their varieties to bring along. 

The Ethiopian blend is particularly tasty and you simply can’t go wrong with the variety pack. Whether you prefer a classic brew or making something more adventurous like a dirty chai, First Ascent delivers on the promise of a high-quality, easy-to-prepare coffee. It’s the kind of good stuff that makes the first ascent of the day significantly more enjoyable.

3. Cusa Instant Cold Brew Coffee

For those days when the sun’s beating down and cold water beckons, Cusa Instant Cold Brew Coffee offers a refreshing alternative. Unlike regular coffee, this cold brew dissolves instantly in cold water, offering a robust coffee flavor that’s perfect for an iced coffee refreshment.

 It’s a great thing for backpackers who want variety and the ability to enjoy a cold beverage without compromising on taste. 

Cusa also makes tasty Cusa Instant Coffee Packs that include flavors like Mocha, Vanilla, and Dirty Chai.

4. Starbucks Via – Instant Coffee for Backpacking

A familiar name for many coffee drinkers, Starbucks Via has set a high bar with its variety pack of freeze-dried coffee. Available in dark roast, medium roast, and even Italian roast, these single-serve packets are a godsend for those who crave specialty coffee roasters’ flavors but need the convenience of instant. 

Found in grocery stores nationwide, Starbucks Via is the best way to ensure a premium instant coffee experience, whether you’re enjoying a sunrise on the Pacific Crest Trail or setting up camp after a long day’s hike.

5. Alpine Start 

Alpine Start is a great brand with plenty of options for coffee enthusiasts. From Alpine Start Original Blend to powdered oat milks and matcha teas to give your coffee and added something. Its instant coffee packets are designed for the outdoor enthusiast who doesn’t want to compromise on their coffee fix. 

With a flavor profile that satisfies both lovers of black coffees and those who prefer their brew with non-dairy creamer, Alpine Start makes a cup of instant coffee that feels like a freshly brewed cup of coffee, one that’s surprisingly similar to what you’d get from freshly ground coffee.

While I could tell Alpine Start was instant coffee, I still really enjoyed the taste.

6. Coffee Tea Bags

Bridging the gap between tea enthusiasts and coffee drinkers, tea bag coffee brands like Kahawa and Wildland introduce an innovative concept: coffee bags. 

Much like a tea bag but filled with premium coffee grounds, these coffee bags offer a unique and different form of enjoying a well-balanced cup of coffee. 

Whether you prefer a light roast or a dark roast, these coffee tea bags are a testament to the versatility and evolution of coffee consumption, making them a top pick for backpackers who cherish the flavor of the coffee and the ritual of brewing it, albeit in a less conventional way.

You can also purchase empty coffee sachets and fill them with your own grounds.

7. Kuju Coffee Pour Over

Swift Cup stands out for its precision in capturing the essence of specialty coffee in an instant form. Known to be among the most expensive instant coffees, there’s a good reason for its price tag. 

For the coffee lover who insists on a freshly brewed cup of coffee that’s a step above the usual instant varieties, Kuju Coffee’s pour-over packets are a revelation. They marry the convenience of instant with the ritual and taste of brewed coffee, offering a fresh cup of coffee that’s rich in flavor and aroma. 

It’s a slightly more involved process, requiring just a bit of extra effort for a significantly more satisfying second sip.

8. Swift Cup

The brand uses a meticulous freeze-drying process to preserve the coffee tastes and aromas, offering a first sip experience that rivals freshly brewed coffee. 

For backpackers concerned about carrying extra weight, Swift Cup’s lightweight packaging means less water is needed to enjoy a premium cup, making it an excellent choice for solo adventurers or a large group looking to start their day with a little…voilà.

9. Waka Coffee

Waka Coffee is a game-changer for instant coffee enthusiasts and a perfect companion for backpacking trips. It dissolves effortlessly, offering a clean, well-balanced cup that’s surprisingly close to a coffee shop brew. 

Waka’s commitment to quality is evident in the coffee crystals’ flavor, ensuring that coffee lovers won’t have to compromise while on the trail. Ideal for a large group, its convenience and excellent taste profile make it a crowd-pleaser.

Waka also makes great instant tea for backpacking if you’re looking for something warm in the evening that won’t keep you up all night.

10. Explorer Cold Brew Concentrate

Not your typical instant coffee, Explorer Cold Brew Concentrate is for those who prefer their in a liquid form. If you absolutely can’t stand powders, a concentrate like explorer cold brew concentrates can still lighten the weight of the liquid you need to carry. 

This concentrate allows you to make cold brew, iced lattes, or even a classic hot coffee by simply adjusting the amount of water or milk—less water for a stronger brew, and more for a lighter taste. They also come in small travel packs. 

It’s perfect for those warm mornings when you crave something cool or for an afternoon pick-me-up. The only downside is its liquid form, which may add a bit of weight to your pack, but for the flavor and flexibility it offers, it’s worth the extra ounces.

11. Maxwell House Instant Lattes

If you like classic instant coffee then Maxwell House is a testament to the old adage that sometimes, the classic choice remains one of the best options. If anyone tells you otherwise simple reply, “Hike Your Own Hike”. 

If you don’t like your coffee black, they have numerous Instant Latte coffee powders and instant mocha coffee powders that are well known for being a reliable and comforting presence for large groups or solo adventurers alike.

With individual packets that cater to those who might not consider themselves coffee purists but still appreciate a good cup of coffee. It ensures that everyone can start their day right, even in the most remote locations.

“REAL COFFEE” Alternatives:

Sometimes you just want to have your favorite coffee brand out on the trail, or you just want a “real” cup of coffee. That’s totally fine. While they might weigh a bit more or require a bit more prep, consider these options:

12. Dripkit

Dripkit isn’t so much a brand of coffee as it is a way to brew. Drip kit has partnered with a TON of famous brands like Stumptown and La Colombe to create fast, single serve, pour over solutions. For those who appreciate the ritual of brewing but need the convenience of instant, Dripkit offers a unique solution. 

Each packet contains a pre-packed filter with ground coffee that you can set over your cup. Just add hot water, and you have a freshly brewed coffee without the hassle of coffee grinds or the need for brewing equipment. 

Ideal for coffee lovers who enjoy the process as much as the first sip, Dripkit’s variety in terms of flavor and roast levels ensures there’s something for every taste.

13. AeroPress

In the quest for the best instant coffees, the AeroPress emerges as a fascinating contender for those willing to venture slightly beyond the realm of instant but still prioritize convenience and quality. Though not an instant coffee maker per se, the AeroPress offers a different way to brew that rivals even the best instant coffees in terms of speed and ease. 

Utilizing air pressure to extract flavors from whole beans finely ground, it delivers a cup of good coffee that can stand up to a blind taste test against traditional brews. 

For backpackers who have a little more space and don’t mind carrying a lightweight gadget, the AeroPress becomes a bridge between the world of instant and the freshly ground coffee experience. 

It allows adventurers to enjoy a superior cup of coffee in the wilderness, bringing the richness and depth of flavor that only whole beans can provide. 

This method not only adds an enjoyable ritual to your morning routine in the great outdoors but also ensures that every cup is fresh, flavorful, and tailored to your taste, making it a unique and beloved tool among coffee enthusiasts on the trail.

14. Backpacking French Press

For the backpacking aficionado who yearns for the taste of coffee as rich and nuanced as a cup brewed from the finest beans sourced from a local roaster, a “Backpacking French Press” offers a transformative experience far removed from the realm of instant coffee powders. 

This is the backpacking french press my dad got me from REI for christmas and I love it, although if you’re already carrying a jetboil, this simple attachment from REI turns it into a french press.

This innovative, lightweight device is designed for the rugged outdoors, enabling adventurers to carry the art of coffee making with them into the wilderness. 

Unlike the instant alternatives, a Backpacking French Press leverages the traditional production process of steeping coarse grounds from small batches of beans, ensuring that the full spectrum of flavors is extracted into every cup.

The difference in taste is palpable, producing a much different product than what one might expect from the convenience of instant formulations. 

With a Backpacking French Press, coffee enthusiasts can enjoy the rich, complex flavors that only come from freshly pressed coffee, capturing the essence and subtleties that only the best local roasters can provide. 

This method not only elevates the morning ritual of coffee drinking in the great outdoors but also pays homage to the meticulous production process of small-batch coffee, bringing a taste of home and luxury to the campsite. 

For those willing to invest a little extra time and carry a bit more gear, the Backpacking French Press turns every sip into a celebration of the coffee’s origin and craftsmanship.

15. Cowboy Coffee

Cowboy coffee is the rugged cousin of a French press (without the filter) and born in the wild heart of outdoor adventurers.  It has a long history in the United States and is the easiest way to make a real cup of coffee on the trail. Here is the recipe I use:

  1. Boil your water, then let it cool for 30 seconds off the heat. For every 8oz (236ml) of water add about 2 tablespoons (21 grams) of your favorite ground coffee (like Counter Culture). Yes it’s okay to estimate.
  2. Stir, let it steep for 2 minutes, stir again, and then steep for another 2 minutes.
  3. After about 4 minutes, pour ½ cup of cold water over the top of grounds to sink them to the bottom. (don’t worry the coffee with still be warm).
  4. Now carefully pour the coffee into your cup, leaving the grounds at the bottom of the pot.
  5. Voila! Cowboy Coffee.

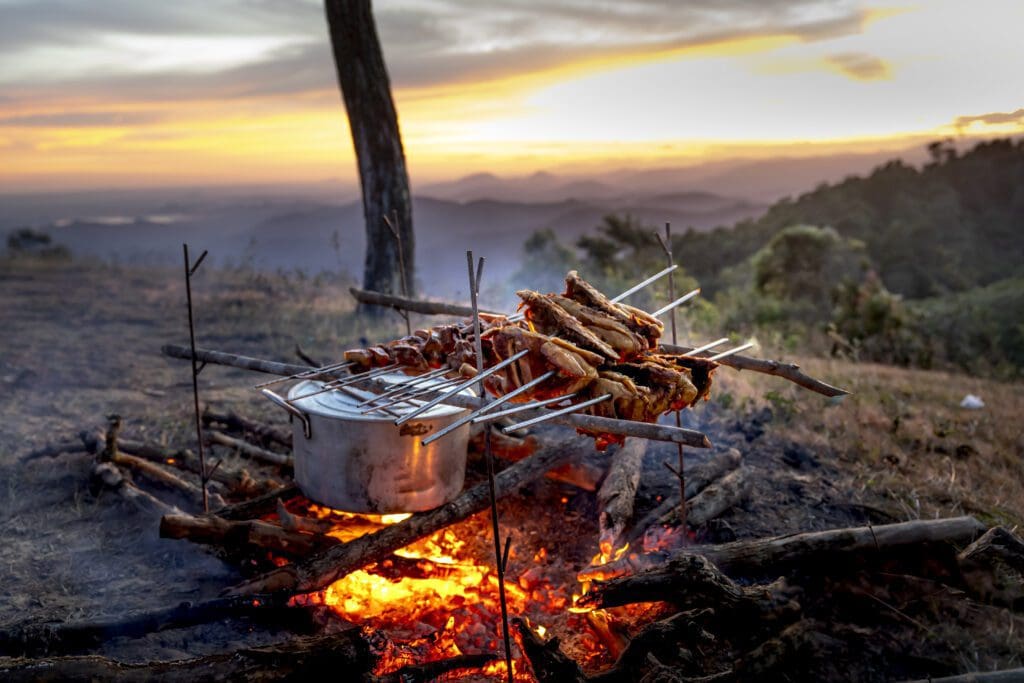
If you’re planning a backpacking trip, consider also checking out our “Best Meats for Backpacking” and “Best Cheeses for Backpacking” articles to elevate your trip even further.


In the end, the journey to find the perfect coffee to accompany your backpacking adventures is as varied and personal as the trails you explore. 

Whether you’re drawn to the convenience and lightweight nature of Mount Hagen’s instant packets, the robust and adventurous flavors of First Ascent, or the refreshing versatility of Cusa’s Cold Brew, there’s a brew that fits every moment of your journey. 

Brands like Starbucks Via and Alpine Start cater to those seeking familiar flavors in the wilderness, while innovative solutions like coffee tea bags and Kuju’s pour-over packets bridge the gap between convenience and quality. 

For those willing to carry a little extra or invest in a unique brewing experience, the AeroPress and the Backpacking French Press offer a taste of artisan coffee that’s miles away from the ordinary.

But beyond the brands, methods, and flavors, what truly matters is how each cup enhances your connection to the natural world around you. 

It’s about the moments of tranquility in the early morning light, the shared cups that warm the spirit after a long day’s hike, and the simple pleasures that turn a journey into an adventure. 

Coffee, in its many forms, becomes more than just a beverage; it’s a companion that brings comfort, warmth, and a sense of home to the heart of the wilderness.

As we’ve ventured from instant powders to freshly pressed brews, we’ve seen that the best coffee is the one that suits your taste, your journey, and your moment. 

So whether you’re savoring a solo cup as the sun rises or sharing a pot with fellow adventurers, remember that the best brew is the one that brings you joy, energizes your steps, and deepens your appreciation for the great outdoors. 

Here’s to finding your perfect trail companion in a cup and to the adventures that await with each sip. Happy trails and even happier sips! I hope to see you out there!

21 Best Paleo Backpacking Foods

Need ideas for Paleo backpacking food for your paleo lifestyle? Well my fellow hikers, you’ve come to the right place. I feel like one could argue that the first ever hikers ate paleo…so there’s bound to be something to it.

Because the paleo diet emphasizes real food like fresh fruit, sweet potatoes, healthy fats, and other whole foods you can find in the produce and meat sections of your local grocery store, the weight can make for a more challenging backpacking trip.

Fortunately, there are a ton of great paleo options to eat in the great outdoors. Whether you’re into freeze-dried meals, dehydrated meals, or looking for some of the best foods to pick up at your local Trader Joe’s, I’ve got you covered.

Snacks:

Snacks are a great way to keep your taste buds entertained on the trail and get in some much needed calories on your long hike before you make camp and keep those energy levels high! 

Epic Bars and Epic Bites

If you haven’t checked out Epic Provisions yet for your paleo snacking needs, you’re missing out. They have a great selection of meat bars and other delicious snacks filled with real ingredients.

I love the Bison-Bacon Cranberry but they have other flavors such as Chicken Sriracha, Salt and Pepper Venison, and Jalapeno Beef. Many of their bars are not only Paleo-friendly but also Whole 30 approved, Keto, and gluten free.

Epic Provisions doesn’t only have bars, they also make other products like Bone Broth, Chicken Crisps and Maple-Smoked Salmon Bites. These snacks are a great source of protein.

Lara Bars

If you’re not in the mood for meat, check out Lara Bars. While not all Lara Bar flavors are paleo, some definitely meet the standard and are filled with natural ingredients.. Some Paleo flavors include Banana Bread, Cashew Cookie, Pecan Pie, and Apple Pie.

While certainly not a low sugar option, you’ve been on the trail all day – so why not get a sweet treat? It’s the perfect way for any avid hiker to get some glucose energy.

RxBars

Similar to Lara Bars, not all RxBars are paleo so you should definitely read the ingredient lists, but these bars can be easily purchased online and have minimal ingredients listed right on the front of the package.  They’re often sweetened with dates and come in a variety of flavors.

Tuna Packets and Salmon Packets.

Whether I am car camping or hiking the trail, I like tuna packets (and salmon packets) for their simplicity. You can pick them up in any grocery store and the fact that it’s in a pouch makes it so much easier to pack it out. #LeaveNoTrace. They also have a nice long shelf life. Just be careful because many of the flavored packets are not truly Paleo.

If you want a little added flavor, bring your own spice mix to add on top. Try Garam Masala, chili powder, sea salt, or even mustard (make it lighter by bringing mustard powder and mixing with water). These lean meats are a good thing to bring on your next trip. 

Trail Mix:

Trail Mix is a quick fix for hunger. Unfortunately many store-bought trail mixes won’t meet the Paleo threshold, but it’s super easy to make your own paleo trail mix.

If you like a sweeter mix, you can add some coconut flakes and/or dried fruit. Like a spicier mix? Consider mixing in some dried chilis or roasting your own almond slivers with a spicy spice blend.

While I know there is no great substitute for hard cheeses, you can consider adding some nutritional yeast to your trail mix for a tasty and (almost) cheesy flavor. It’s also a great source of B vitamins.

Nuts:

Avoid peanuts (that’s a legume) and always read the label but you can find some great pre-packaged nut options and other paleo backpacking foods in your local gas station. 

Nut butters

Nut butter packets are an easy way to bring some calorie-dense snacks on your next adventure. They can be eaten on the go or enjoyed in camp next to the fire.  

If you’re doing strict paleo, legumes are not allowed so avoid peanut butter and instead go for a high-quality almond butter.

Olives:

Whether you’re on a road trip or a backpacking trip, I think olives are a fantastic snack. They are filled with healthy fats, and if you are looking for some more calories, find packets that use olive oil to preserve them.

Fresh Berries

Fresh berries are definitely a paleo backpacking food, but they don’t always hold up to a hike as well as I wish they would. I either try to bring them in a hard sided container (like a nalgene), or in the summer where I live, I can often pick wild huckleberries and snack as I go!

Just make sure you’re confident in your ability to identify the edible fresh berries where you live. 

Kale Chips:

Whether you buy a paleo friendly option in a store or make your own at home, Kale chips add a great crunch on the trail. Similar to the fresh berries, you have to make sure you store them properly or you’ll end up with a Kale powder to dust over the top of your evening meal.

Beef Jerky:

Not all beef jerky is good for a paleo backpacking snack. The problem tends to lie in the added sugars, so always read the ingredients. You can purchase your favorite brand or make it at home in your dehydrator (if you have one).

Fresh Vegetables

While certainly more weight than dehydrated veggies, sometimes there is no substitute for fresh. Go with hardy vegetable options that can handle a little abuse like carrots. They also go great with those aforementioned nut butter packets. 

Meals:

If you’re lucky enough to have a freeze dryer at home, you can go wild with a ton of incredible recipes and bring your favorite foods with you anywhere. If you’re like me, you’re stuck buying the freeze-dried meals. It’s a great way to save on weight but it’s not always the cheapest option.

There are also several paleo meals you can get ready at home to save you time on the trail:

Chia Seeds and Coconut Milk Powder

Chia Seed pudding is a great option for a paleo breakfast, especially if you’re hiking somewhere warm and want something a bit cooler. You can experiment at home with your ideal ratios but I find 1/4 cup chia seeds to 1 1/4 cup coconut milk makes a pretty nice consistency.

The great thing about making this at home is you’re free to add your favorite toppings. Want crunchy? Add some chopped nuts. Want sweet? Add some coconut sugar, coconut savings, and/or freeze dried berries.

You can even make more savory puddings. There are so many different options you’ll never have to eat the same chia pudding twice. 

Next Mile Meals:

If you haven’t heard of Next Mile Meals, you’re in for a great surprise. Started by some thru-hikers taking on the Pacific Crest Trail (PCT) when they had trouble finding have paleo and keto freeze-dried meal options, these recipes they developed are nothing short of outstanding.

When I spent two weeks rafting down the Aniak River in Alaska, I loved digging into these after a long day. My top pick would be coconut chicken curry. It’s aromatic, filling, and high quality.

The Cajun Jambalaya is also a great choice for Paleo backpackers it’s got okra and red bell pepper.

If you like hot wraps, I’d go with the Deli Roast Beef. They make it with thinly sliced beef seasoned to perfection. Just be aware that the mustard and mayo packets are, unfortunately, not paleo but they are packaged separately so you can just forego it. BYO Paleo Wrap.

And make sure you read the ingredients list. Several of the flavors are just for keto and not for paleo (they have hard cheeses). While they have gluten-free meal options, they do not have any vegan or vegetarian options.

Wild Zora Foods.

Wild Zora Paleo Meals specializes in providing high-quality, freeze dried, paleo backpacking food. They’ve got numerous Paleo backpacking food options ranging from 350 calories to 500 calories per meal.

They’ve got various paleo-friendly meals, like palisade pineapple mango, bedrock beef chili, summit savory chicken, cliffside coconut berry, caldera chicken curry, butte cacao banana, and mountain beef stew.

They have options for meat eaters and vegans alike and all their meals are gluten-free. They also make paleo soups and snacks so it’s definitely worth checking them out for a resupply.

Soups:

Whether you make your own soup packets or bring a pre-made mix, a paleo soup can be a great way to warm up quickly on any camping trip. To make the most satiating meal possible, consider adding in some freeze-dried meat or hemp seeds.

Mountain House sells cannisters of freeze dried beef and chicken that you can purchase, and then separate into your own soup mixes. This is a great way to add multiple grams of protein without adding too many grams of weight. Unfortunately, most pre-packaged mountain house meals aren’t paleo-friendly so stick with the pure diced beef, ground beef, and chicken options.

As for hemp seeds, not only do they add great texture to any soup, but they have all the amino acids, making them a wonderful way to add protein on your outdoor adventures. You can also add coconut milk powder to your homemade soups to add creaminess.

Soups are great for people with dietary restrictions because you can put anything you want in there. There is no better way to develop recipes than experimenting in your own kitchen,

Wraps:

For a paleo backpacking lunch is there anything better than a wrap? Take your favorite Paleo wrap and put your favorite paleo snacks in there. It’s really as easy as that.

You can make something people have heard of before and use almond butter with a homemade paleo jam, or go completely feral and put anything you want in there, from trail mix and beef jerky to pemmican.  

Check out my Best Meats for Backpacking article for additional meat ideas that you can place into a wrap. While not all the meats listed are paleo-friendly, there are still many paleo-friendly options lists like smoked salmon, canned chicken, and biltong….just to name a few.

Pemmican

Native Americans have used pemmican since time immemorial. It keeps well, tastes good, and provides excellent energy when you need to hike a long distance. There are a ton of different recipes with varying amounts of berries, meat, and fat. 

Hot Cereals (Paleo Porridge)

By mixing flax seed, chia seeds, and even some nuts, you can make a hot porridge that will help keep you warm on the coldest mornings (or evenings…I mean, I like breakfast for dinner).

Add in things like ginger, cinnamon, and cloves and then wait until you’re out on the trail to heat up your water and mix it all together. This will help you avoid carrying pounds of food in water weight and it doesn’t take much water to rehydrate them. 

Drinks:

When hitting the trail, it’s a good idea to bring some hot drink options:

Coffee

Coffee is the best way to get up in the morning and it’s Paleo! Some backpackers I know insist on bringing an AeroPress and making their coffee fresh. Others are more than happy to mix an instant coffee packet with a little hot water and call it a morning.

Either way you really can’t go wrong with coffee in the morning. Consider adding some coconut oil for some additional calories. I hear bulletproof coffee is all the rage these days.

You can also add coconut milk powder for creaminess or coconut sugar if you like it sweet! Avoid the added sugar if you want to keep it low calorie of course.

Tea

From matcha green tea powder, to black tea, to herbal teas, the options are truly endless in the tea arena – so many great flavors.

Caffeinated teas can be good when you need a pick me up and the herbal teas are a fantastic thing to sip when you want something warm in your belly before nightfall (just don’t drink too much or you’ll be up all night).

Electrolyte Mix

Electrolytes are essential to replenish when you are exercising strenuously. There are numerous brands, like Paleo Pro Hydrolyte+ that provide paleo-friendly electrolytes. It also is a great way to add some flavor to your water.

Best Paleo Backpacking Food Conclusion

Finding healthy meals when you’re looking for paleo backpacking food options shouldn’t be difficult. With a little creativity you can continue to eat your favorite healthy foods and still enjoy the great outdoors. Good luck and happy trails. I hope to see you out there!

50+ Best Travel Essentials for Women

This post may contain affiliate links, which means I’ll receive a small commission if you purchase through my links, at no extra cost to you. Please read my full disclosure here.

Ensuring you have absolutely all of the perfect travel essentials for women is no easy task. While many of the best travel essentials are the same for both men and women, us ladies also have some unique requirements when it comes to essentials for travel.

Below you will find a comprehensive list of travel essentials for females. Remember, you won’t need every single one of these on every trip – but it’s a good idea to peruse this packing list of travel essentials to make sure you haven’t forgotten anything for your upcoming adventures! Whether you’re exploring new places for the first time, or returning to old haunts, the following items will help you on your journey. You always want to buy good things at a great price.

1. VPN:

A VPN is crucial if you’re planning to do any amount of traveling. Public wifi, both overseas and domestically, makes it very easy to get your information (passwords, bank accounts, etc) stolen. The best way to keep your info protected is a VPN. When you’re abroad, a VPN also gives you access to everything from Netflix and Hulu to your bank account.

Unfortunately, free VPNs are free because they sell your data and fail frequently. They’re insecure. I like NordVPN but ExpressVPN and TorGuard are also popular. NordVPN has an easy interface and it works on your computer, your smartphone, and I even use it on my Amazon Fire TV to watch my favorite shows abroad. They’re currently running a great deal!

2. Door Stop Alarm:

Sometimes you’re in a hotel room in a great part of town, and other times the hotel room lock is…questionable. In such scenarios, it’s a good idea to bring a door stop alarm as part of your travel essentials for women. When you’re ready to go to bed, just place it in front of the door. Not only does it stop the door from opening, if the pressure pad gets pressed a loud alarm goes off, ensuring you can get up and deal with the situation.

3. Toiletry Bag:

A bag for your toiletries and any other personal item may seem obvious, but not all toiletry bags are created equal. While a Ziploc bag will do in a pinch (trust me, I’ve used plenty of them) – there are so many better options. A good toiletry bag will have you spending less time getting ready and more time off on your adventures – while keeping your toothbrush clean. It also makes it easy to remove your liquids for airport security. Travel and Leisure magazine did a great review on different toiletry bags for all occasions.

4. Lip Balm:

I don’t care if you are on a long flight to Hawaii, riding a camel across the Sahara Desert, or mushing huskies through the Lapland region of Finland, lip balm is high on the list of travel essentials for women. Lip balm (also known as chapstick) keeps your lips feeling, and looking, their best. I have a tendency to lose my lip balm so I like to bring two. I like Burt’s Bee’s.

5. Travel Insurance:

Plenty of travelers don’t use travel insurance – I typically travel without it. And many credit cards offer some sort of travel insurance as well which is worth checking out. You don’t need travel insurance if you’re not putting down non-refundable trip deposits.

Advocates like the peace of mind travel insurance brings. Travel insurance provides a safety net of comprehensive coverage for unforseen circumstances. Medical emergencies, trip cancellations, lost baggage, environmental disasters requiring evacuation, illness, family emergencies, etc etc etc.

Travel insurance makes sure you are reimbursed for any of these things that you would otherwise be on the hook for (dependent on policy). Plans are often cheap and easy to get. Two respected companies are EKTA (plans start at 99 cents per day), VisitorsCoverage (ideal for traveling in the Americas).

6. Sunscreen:

Sunscreen is one of the most important travel essentials for women. A great vacation can be ruined by a bad sunburn. It’s painful, hazardous to your health, and not exactly “cute”. A sunburn can take a week or more to heal – meaning if you get burned, you likely have it for the duration of your vacation. If you find yourself in or around any beaches, please try and use reef safe sunscreen. Reef safe sunscreen helps protect coral and your skin! For a complete guide to reef safe sunscreen, click here.

7. Toothbrush, Toothpaste, Toothbrush Cover:

I feel like as far as travel essentials for women go, this one is pretty self-explanatory. Whether you’re on a long-haul flight or a short trip, it’s also a travel essential for everyone. Your toothbrush won’t always have time to dry before putting it away. A cover keeps it, and the stuff in your toiletry bag clean. A travel friendly toothpaste option can be toothpaste

8. Hair Ties and Hair Clips:

Unless you’re rocking a pixie cut, hair ties are almost certainly on most packing lists of travel essentials for women. On a hot day, it is so nice to throw up your long hair and get it off your neck. I always bring a few extras because hair ties have a tendency to snap at the worst possible times.

9. Deodorant:

Deodorant for travel. It’s one of the best ways to stay fresh on long haul flights…or anywhere really. If you won’t do it for yourself – do it for the person next to you. It could be me. You can really choose any deodorant that works for you. If you need a recommendation, this deodorant has good reviews.

10. Menstrual Cup, Discs, Tampons or Pads:

If you know, or thing you might, be on your period when traveling, it’s great to come prepared. If you’re traveling off the beaten path, nothing beats the menstrual cup – it’s easy to use but can take some practice.

Otherwise just bring some tampons, pads, or whatever you’re used to. I always tend to have a couple in my toiletry bag to help out anyone in my group, or hostel, that may have forgot.

11. Make-Up and Other Beauty Products:

Okay, I agree. Make up is not always a travel essential, but certain trips are less about hiking through national parks and more about partying on Mykonos or on a business trip. If yours is the latter, then you might consider your favorite make-up a women’s travel essential. But you’re perfect just the way you are! Interested in buying some products?

12. Hair Dryer, Hair Straightener, Hair Curler:

A small travel blow dryer can be great if you don’t expect to have one in your hotel room or hostel (though many places have them these days. Call ahead and if your place doesn’t have a hair dryer, you can throw one in your bag.

If your hair is as unruly as mine, styling tools are definitely on the list of women’s travel essentials. If you’re traveling internationally, make sure to get one with the right voltage. I’ve fried many a styling tool in the wrong country…R.I.P. Or get yourself some Dual Voltage hair straighteners or dual voltage hair curlers. Aria products aren’t cheap, but they’re great quality that last forever.

13. Dry Shampoo and/or other Hair Products:

Dry Shampoo can be a great way to freshen up between washes, especially if your hair is oily or you’re in a hot or humid environment where you’ll be sweating. Remember to bring all your other essential feminine hair products (hair spray, gel, heat protection). You can buy small travel bottles and fill them with your favorite products.

14. Razors

If you shave and like razors, it’s an essential. If you don’t – then don’t.

15. Face Wash:

We enjoy life to the max when traveling but breakouts never take a vacation. For those with sensitive skin, it’s important to keep up with your skin routine. Get a small travel bottle and fill it with your favorite face wash or cleanser. Don’t forget body wash as well!

16. Hand Sanitizer:

Sometimes a hand washing station or bathroom can be hard to find. Keep things sanitary. Avoid food poisoning. Bring hand sanitizer and hand sanitizing wipes in your travel essentials for women kit.

17. Neck Pillow:

A neck pillow is a great option for any travel be it plane, train, or car. You can sleep sitting up and avoid a cramp in your neck.

18. Inflatable Travel Pillow:

Another good option is a travel pillow, especially if you’ll be doing any camping. These pillows are lightweight and inflatable. Perfect for backpacking across Europe or camping in the outback.

19. Eye Mask:

When you absolutely, positively, must get some sleep – get an eye mask. It’s great for blocking out light on airplanes, in airports, or if you need a few extra zzz’s in the morning. I recommend using ones with eye cups. They are so much more comfortable.

20. Reusable Water Bottle (Collapsible):

Ditch plastic and bring a reusable water bottle. Check out a collapsible water bottle. These things are absolutely fantastic for saving space when not in use and they are super light.

21. Packing Cubes:

If you haven’t tried packing cubes, you should consider them for your next trip. I consider these to be an important female travel essential. Packing Cubes save space by compressing your clothes more efficiently in a suitcase or a backpack. They also help you stay super organized during any long trip – providing easy access to all your stuff.

22. Jewelry Organizer:

Have you ever been on a trip, placing your favorite jewelry in a bag, and it all comes out in a tangled mess? Just me? Well that’s a major reason to get a jewelry organizer. These nifty things keep all your best small items and jewelry pieces tangle free and safe from breaking.

23. Laundry Bag:

A laundry bag is a perfect way to keep dirty clothes separate from clean items. On a longer trip, laundry bags make it easy to transport your clothes to the nearest laundromat or hostel washing machine. They make collapsible bags that weigh very little.

24. Comfortable Shoes:

Comfortable walking shoes are a travel essential for women. Figure out what type of vacation you’re going to have. Considering a beach vacation? Bring sandals. Hiking? Grab some trail runners. Partying it up? Heels. Bring shoes that can be used for many things.

A comfortable pair of flats is always a great way to take in the city. I love love love allbirds. They are machine washable, super packable, very comfortable, and chic.

25. Shoe Bag:

Shoes get dirty. It’s a fact of life. But when dirty shoes are packed in a bag with clean clothes, it can ruin some of our best pieces before we even get to our destination. Shoe bags are a game changer. They keep your shoes separate from everything else in your bag. A great way to stay clean and organized.

26. Apple Watch or Smart Watch:

Why is a smart watch one of the travel essentials for women? Apple watches are good for travelers because they are convenient, portable, provide notifications, offer health and fitness tracking, assist with navigation, support contactless payments, and have efficient battery life. It’s an easy way to stay connected.

27. Portable Chargers:

For road trips, long flights, or really any travel lasting more than a day, you’ve got to bring your portable charger. It’s a travel essential for women, men, and anyone with a phone.

Charging your devices is not just about convenience, your phone provides research, taxis, flight information, and can be used to call for help in an emergency. Keeping it charged is critical. Bring the portable chargers. It’s a travel essential for everyone.

28. Power Banks:

One way to make sure you always have a charge available on your phone, even if going off-grid for awhile, is to bring a battery bank. These come in all shapes and sizes. I have some power banks that are great to charge your phone one time and can be used in an emergency. I have others that can charge my laptop multiple times. Figure out which power bank you need, CHARGE IT FIRST, then bring it on your trip.

29. Travel Adapters and Travel Converters:

If you’re traveling abroad – the plugs, and the voltage, will most likely be different. Travel adapters change the shape of your plug to fit into any socket. Travel converters allow you to use your product with a different voltage. Travel converters are not something you want to skimp on. They protect your most important electronic devices and many of the cheaper ones tend to fail at the worst possible times.

30. Personal Alarm

So the alarm on your phone is fantastic. Most of the time for vacation I just use that. But when I am traveling for work, I often have important meetings to get to early in the morning. I like to have redundancy in my alarm clocks.

That’s where a travel alarm comes in. I never have to worry about losing my phone or my batter going dead and not getting up in time for an important work function. You don’t need anything expensive or fancy. The one below is good.

31. Noise-Cancelling Headphones

Bringing noise-canceling headphones when traveling is great because they reduce external noise (great for naps), enhance audio quality (for your music), promote focus and productivity (in case you need to work), improve health and well-being (if you end up in the gym), provide entertainment on the go (Netflix on the plane), and offer privacy and personal space in crowded environments.

I use Bose headphones. It comes with a wired headphone adapter for planes.

32. Wired Headphones for Planes

Most airplanes have yet to adopt Bluetooth technology which means you’re going to be stuck with wired headphones. Airline headphones are typically pretty low quality. Get yourself a set of wired headphones to avoid this issue if you don’t have wireless headphones with an airplane attachment.

33. Credit Cards:

Having a reliable credit card is a travel essential for women. I love my Chase Sapphire Reserve. There are no international transaction fees, if it gets stolen I’m not liable and they will overnight me a new card, they have worldwide free customer service, and they never shut off my card when traveling.

There is nothing worse than your bank shutting off your card because you didn’t tell them you were going somewhere. I know quite a few people use American Express Platinum or the United MileagePlus card. It’s all about that points game!

34. First Aid Kit:

Whether you pack one yourself or get something pre-made, a small first aid kit complete with a lot of things like ibuprofen, blister tape, and aloe gel can be a life saver.

35. Pepper Spray:

Pepper spray is great to have on hand for self defense, but it’s illegal in some countries (I’m looking at you Canada). So check the laws before you travel but pepper spray can be one of those travel essentials for women that we’re glad we have – but hope we never have to use.

You won’t be able to take this through airport security in case it explodes on the plane. It’s important for the pilots to see.

36. Tote Bag:

Totes are one of the travel essentials for women because they are so versatile. They are great for shopping bags, day trips to the beach, or an emergency purse. They’re inexpensive so pick one you love off Etsy or Amazon and voila!

37. Books and Magazines:

Is it really a vacation if you don’t read a good book at some point? Don’t feel pressured to force your way through that nonfiction novel (unless that’s your thing) – get that light, fun, fictional beach read and enjoy your travels. In case of an airplane delay, you should also throw one in your carry-on bag.

38. Travel Documents:

Have I gone to the airport without travel documents? Yes. Did I get on the plane? Of course not – I missed my flight. This is why it’s crucial to bring your important documents. Don’t lose them. Keep them safe. If you do lose them, call your embassy’s consular section. They’ll help you out. Remember to keep digital copies of travel documents as well for extra protection.

39. Hand Luggage

Hand luggage is often the only luggage you need on short trips. The best part of hand luggage only traveling is it saves you a lot of time waiting for your luggage at baggage claim and minimizes the chance it will get lost.

Since you don’t have as much space, you’ll want a good way to keep things organized (like packing cubes). If you invest in high quality hand luggage, it will last for a very long time.

40. Scarf or Shawl:

A scarf or a shawl can be an incredibly versatile piece of clothing while traveling. It can be used for warmth on chilly airplane rides, in cold weather, as a beach coverup, a picnic blanket, or to provide modesty in religious sites. Lightweight and easy to pack, it’s an item you won’t regret bringing along.

41. Prescription Medications:

If you take prescription medications, be sure to pack enough for the duration of your trip. It’s also wise to keep them in their original packaging with your name on it, to avoid any potential issues at security. Always carry them in your hand luggage in case your checked luggage is lost or delayed.

42. E-Reader:

If you’re a voracious reader, an e-reader can be a game-changer. It can store hundreds of books in one lightweight device, making it an ideal companion for long journeys or relaxing days on the beach. Kindle is a popular choice with a large library of titles to choose from.

43. Snacks:

No matter where you’re traveling to, it’s always a good idea to have some snacks on hand. Not only do they tide you over during long journeys or in case of unexpected delays, but they can also provide a bit of home comfort if you’re traveling to a country with unfamiliar food. Choose snacks that are durable and won’t spoil easily, like granola bars or nuts.

44. Wet Wipes:

Whether you want to freshen up after a long flight, clean your hands before a meal, or wipe down a suspiciously sticky table, wet wipes are a handy item to have in your bag.

Travel Wet Wipes on Amazon

45. Sunglasses:

Protect your eyes from the sun’s harsh rays and look stylish at the same time. Sunglasses are an absolute essential, especially if you’re traveling to a sunny destination.

46. Portable Laundry Detergent:

If you’re planning a longer trip, carrying a small amount of laundry detergent can be incredibly handy. You can hand-wash clothes in the sink or bathtub of your accommodation, reducing the amount of clothing you need to pack. In fact, Tide make special laundry detergent for sinks!

47. Swimwear

Even if you’re not planning on swimming, it’s always a good idea to pack a swimsuit. You never know when you might come across a beautiful beach, hot tub, or pool.

48. Travel-Size Umbrella:

A small, lightweight umbrella is a good thing to have on hand, especially if you’re traveling during the rainy season. It can also provide shade on particularly sunny days.

49. Quick Dry Travel Towel

This can be a lifesaver in situations where towels are not provided, or you want to ensure you have a personal, clean one.

50. Travel Journal

This can be a great way to document your experiences, thoughts, and memories during your travel. It can serve as a fantastic keepsake after your journey ends.

51. BONUS!!: Cell Phone Carrier: T-Mobile or Google Fi

Look, everyone has preferences on their mobile carrier and far be it from me to tell you which one to get. One thing to consider for women who travel internationally is data roaming charges. T-Mobile has many plans with unlimited texting and data in over 215 countries.

This makes it my go-to choice for mobile carrier. Google-fi also uses the T-mobile network so you can also get free international data through google-fi.

52. BONUS!!: Insect Repellent

Avoid Mosquitoes. Bring insect repellent if you plan on spending any time outdoors.

Table of Contents – Travel Essentials for Women

Conclusion

These top travel essentials for women are a great start to any essential items list. Of course, it’s a good idea to make a list of important items to take with with you – especially if you have any unique needs like medications. That way, your must-have travel essentials are always available.

Looking for the perfect caption following your adventures? Check out our 100s of PERFECT captions for Instagram article!

Remember, you should always keep your most important things in your hand luggage when traveling. The last thing you want is to lose your most important travel necessities if your luggage gets lost.

Packing wisely for travel days, especially when visiting a new city, makes a big difference. Utilize Google Maps to navigate, prepare for both cold and warm weather, and remember essential items like a charger with multiple USB ports for long days out.

A well-organized bag (in a variety of different colors) can include items to suit any occasion, essential oils for refreshment, and favorite brands for comfort. Also, consider personal items like some pairs of shoes and separate bags for dirty laundry.

Remember, these items are just a guide and your personal travel essentials might differ. Consider your destination, the length of your trip, the weather, and your personal preferences when packing. Safe travels!

19 Best Cheeses for Backpacking You’ll Love –

This post may contain affiliate links, which means I’ll receive a commission if you purchase through my links, at no extra cost to you. Please read my full disclosure here.

Introduction:

After a long hike, there is nothing like a good piece of cheese to take away that pang of hunger before you begin dinner. What are the best cheeses for backpacking? What should you avoid? Your quest is complete! Whether you’re tackling the Appalachian Trail or embarking on shorter outdoor trips, hard cheese is a versatile, protein-rich fuel source for those demanding hikes..

With a plethora of cheese types each bringing unique flavor and nutritional value, choosing the best cheese for backpacking extends beyond taste to practical aspects like shelf life, weight, and pairings.

So, what constitutes the best hard cheese for backpacking?

A cheese with a long shelf life that can endure room temperature is vital when you’re far from a grocery store.

Weight is equally important; a lightweight cheese makes for an easier carry.

And flavor matters; a cheese that’s delightful solo and pairs well with the best meats for backpacking can elevate your food choices into memorable backpacking meals.

Imagine ending a strenuous day on the trail with a piece of the best cheese, savored with trail mix or dried fruit, a simple luxury enhancing your outdoor adventure.

This article aims to guide you through selecting the best hard cheese for backpacking, considering all these crucial factors.

By the end, you’ll be prepared to choose a cheese that meets your taste and needs, ensuring a superior culinary experience on your outdoor escapades.

Let’s explore the world of backpacking-friendly cheeses!

Best Hard Cheese for Backpacking

1. Moon Cheese:

Does it get any harder than Moon Cheese? If you haven’t heard, this is a crunchy, dehydrated cheese snack available in multiple flavors. It’s made with 100% natural cheese and is a great source of protein and calcium.

It lasts pretty much indefinitely and is extra light. It’s great in anything from trail mixes to springled in your meals for an added crunch!

2. Easy Cheese:

While I’m not sure we can really call this cheese, this is a canned cheese product that doesn’t require refrigeration. It’s a convenient and lightweight option for backpacking trips. You do have to pack-out the can though which can be a bit of a pain, and cheese lovers may scoff at bringing this on their next backpacking trip.

3. Parmigiano Reggiano:

Known as one of the world’s finest cheeses, this aged cheese has a long shelf life and a flavor that only improves with age. It can handle warm temperatures and is perfect parmesan cheese for grating over meals.

Its lower moisture content allows it to last a long time, making it the best option for longer hikes – enhancing your backpacking meals. In fact, you often find Parmigiano Reggiano in unrefrigerated spots of the grocery store.

4. Pecorino Romano:  

This is a cow cheese similar to Parmigiano Reggiano. Pecorino Romano is a hard, salty Italian cheese that’s perfect for backpacking due to its long shelf life and ability to withstand warmer temperatures. 

5. Gouda:

If properly waxed, Gouda can last several weeks without refrigeration. Of the aged hard cheeses, it’s a versatile cheese with a mild flavor that pairs well with a variety of foods.

With it’s firm texture and rich flavor, this is an ideal hard cheese for backpacking.  I love to pair it with apples and some jerky but it can also be put into a backpacking meal for added flavor or eaten alone. Gouda comes in various flavors (like smoked!) so feel free to experiment.

6. Cheddar:

This kind of cheese has a bold flavor and a good shelf life, making it a good option for backpacking. Its versatility in pairings also makes it a popular choice.

Additionally, cheddar cheese often comes in single-serve packets which are perfect for backpacking. Aged cheddar can be kept without refrigeration for a few days. Its rich and robust flavor makes it a favorite among backpackers.

7. Swiss Cheese:

Swiss cheese can last a couple of days at room temperature, and its light and nutty flavor is a great addition to any meal. Pack it in an airtight container or a zip-lock bag to maintain freshness.

8. American Cheese:

Believe it or not, processed cheeses like American cheese can last longer without refrigeration than other soft cheeses. So if you want a trail grilled cheese or quesadilla – go crazy!.

9. Dehydrated Cheese:

Dehydrated cheese (dry cheeses) can be made at home using a food dehydrator, or bought from outdoor stores. It’s lightweight and can be rehydrated on the trail, making it a great choice for backpacking.

They are often the best option for long periods of backpacking due to their lower moisture content. They’re some of the best hard cheese for backpacking.

10. Manchego:

This semi-hard Spanish cheese has a rich, nutty taste that will satisfy your palette on the trail. Its robust flavor and texture last well in backpacking conditions, making it a great addition to your next outdoor adventure.

11. Asiago (aged):

Asiago cheese has a slightly sweet and nutty flavor. When aged, it becomes firm and flavorful, which is excellent for grating on trail meals.

Hard Cheese Conclusion:

You can find these harder cheeses at local grocery stores, cheese mongers, or online. Remember, even though this type of cheese (firm cheese) can handle warmer temperatures, they should still be consumed within a certain timeframe to ensure they’re safe to eat.

Soft Cheeses for Backpacking

As a general rule, according to the US Department of Agriculture, “Soft cheeses such as cream cheese, cottage cheese, shredded cheeses, and goat cheese must be refrigerated for safety.” As such, if you choose to bring a softer cheese onto the trail, I’d eat it early on in the journey.

It can be a great addition to a first lunch or dinner and you can freeze cheese to keep it colder longer in your bag.

12. Laughing Cow:

This cheese comes in individual packets, making it easy to portion and pack. Its creamy texture and mild flavor make it a versatile option for backpacking meals or day hike lunches. It’s great on a baguette.

13. Babybel:

Babybel is a semi-soft cheese. According to Babybel, thanks to its protective shell, it may be stored unrefrigerated at room temperature of 20 degrees Celsius for several hours, such as in your lunchbox.

That protection comes in the form of a wax coating, making it more resistant to warmer temperatures. It’s compact and comes in various flavors, perfect for adding some variety to your meals on the trail.

14. String Cheese:

Perfect for snacking during a hike, string cheese is a convenient option. It’s wrapped up airtight and will be okay for an early on snack in your journey.

15. Brie:

While brie is typically seen as a luxury cheese, single-serving packages of this soft, creamy cheese with a mild taste can be a fun treat on the trail.

Brie is one of my favorite fresh cheeses, despite it’s extra cost. Pair it with a baguette and some dried fruit for a trail-side charcuterie experience. Don’t bring a whole thing of brie though – it will turn into a mess. Only single serve packets.

For charcuterie, check out the best meats for backpacking list. 

Best Vegan Cheeses for Backpacking

16. Nutritional Yeast:

While not a cheese per se, nutritional yeast “nooch” is a staple in many vegan diets. It has a cheesy flavor and is lightweight, making it an ideal option for backpackers looking to add a cheesiness to a low-fat spread. It can be sprinkled on almost any food for an added boost of flavor and nutrition.

17. Vegan Cheese Spreads:

Vegan cheese spreads, such as those made by Treeline or WayFare, can be a good option. They’re made from a variety of plant foods like nuts and seeds, which are high in protein and healthy fats. Some can be stored at room temperature until opened.

18. Vegan Cheese Slices or Blocks:

There are vegan cheese slices available that are individually wrapped and do not require refrigeration until opened, such as those from Follow Your Heart or Violife (my favorite is the smoked cheddar ones).

19. DIY Dehydrated Vegan Cheese:

For the more adventurous, you can make your own dehydrated vegan cheese at home using ingredients like cashews, nutritional yeast, and various spices. This option is lightweight and can be rehydrated on the trail with a little water.

Worst Cheese for Backpacking:

There are certain types of cheese that are less suitable for backpacking due to various reasons such as their need for refrigeration, potential for messiness, or faster spoilage. Here are a few examples:

1. Camembert:

These soft, creamy cheeses are delightful on a cheese board, but not ideal for backpacking. They require refrigeration to maintain their texture and flavor, and can easily become runny and messy in warm weather.

2. Blue Cheeses (like Gorgonzola or Roquefort):

Blue cheese is prone to spoilage at higher temperatures. Their strong odor can become more pronounced as well, which may not be desirable in a confined space like a backpack on a hot day. But in colder temperatures, it can be good fuel for short trips like day hikes.

3. Mozzarella:

Fresh mozzarella has a high moisture content and requires refrigeration. It can spoil quickly in warmer temperatures, making it less suitable for longer hikes.

4. Ricotta Cheese and Cottage Cheese:

These cheeses require refrigeration and can spoil quickly without it. Unless you’re planning to consume them within the first day, they are best avoided.

5. Cream Cheeses:

I know cream cheese is above as well, but while some cream cheeses come in individual packets that may last a day or two without refrigeration, most types spoil quite quickly when not kept cool.

6. Feta:

This cheese is often sold in brine to maintain its texture and freshness, making it unsuitable for backpacking as it requires refrigeration and can become messy. Dry feta crumbles would probably be okay for short hikes.

7. Cheeses with Fruit or Vegetable Additives:

Cheeses that contain additions like fruits, vegetables, or other flavorings can spoil faster than plain cheeses, so they should be avoided on longer trips.

8. Sour Cream

It’s not a cheese but I feel like it should be said. Sour Cream doesn’t fair well for long periods outside of the fridge. Just don’t do it. It needs to be kept at lower temperatures.

Cheese to Avoid Conclusion

In general, for backpacking, it’s best to stick with hard, aged cheeses, or specially packaged cheeses that are designed to be shelf-stable. Always be mindful of the temperature and length of your trip, as these factors greatly impact how well your cheese will fare.

Backpacking Cheese Pairings

1. Apples:

The sweetness of apple slices pairs well with the sharpness of cheddar or the creamy, mellow tastes of a soft cheese for backpacking.

Apples are robust, carrying well on the trail, and their crispness provides a pleasant contrast to the rich, fat content of cheese. They’re best consumed earlier in the trip due to their water weight.

2. Hot Sauce:

Spice up your trail meals by adding hot sauce to a spicy Monterey Jack or even a semi-soft cheese for backpacking. The heat from the sauce complements the cheese’s creaminess, creating a burst of flavor that can be a welcome change from typical trail food.

3. Black Pepper:

Something as simple as black pepper can greatly enhance any cheese, especially the best hard cheese for backpacking. It adds a layer of complexity to the flavor profile and can turn a simple cheese and cracker meal into a memorable culinary experience.

4. Beef Jerky:

Pair the saltiness of beef jerky with a nutty Gouda or a robust cheddar to create a mouth-watering, protein-packed snack.

5. Peanut Butter:

Try combining peanut butter with a semi-hard cheese for backpacking. The sweetness of the peanut butter can balance out the savory, umami flavors of the cheese.

Peanut Butter

6. Instant Rice:

A sprinkle of dehydrated cheese can greatly enhance a simple instant rice meal. This combination is easy to carry on a backpacking trip and provides a satisfying, energy-boosting meal.

7. Ramen Noodles:

Much like instant rice, ramen noodles can be elevated with the addition of a little cheese, creating a comforting and satisfying dish after a long day of hiking.

8. Freeze-Dried Meals:

Add a sprinkle of dehydrated cheese to your freeze-dried meals for an extra flavor boost and calorie addition. This can be particularly beneficial for those hard hikes.

9. Pancake Mix:

Adding a little cheese to your pancake mix can turn your morning breakfast into a savory treat. This pairs wonderfully with a semi-soft cheese for backpacking.

10. Crackers:

Cheese and crackers IS A CLASSIC. It offers a simple yet satisfying go-to for backpacking meals or snacks.

This combination works well with any type of cheese, from the best hard cheese for backpacking to softer alternatives.

11. Trail Mix:

If you’re a fan of snack foods, consider pairing your cheese with trail mix. The varied textures and flavors can make for a quick, high-energy meal.

12. Pork Rinds:

These can be a surprisingly good pairing with cheese, providing a crunchy, salty component that contrasts nicely with the creamy texture of cheese.

13. Instant Oatmeal:

Adding a bit of cheese to your instant oatmeal can create a unique flavor combination that’s also a great start to your hiking day.

14. Bread:

For those who prefer a more traditional approach, cheese pairs wonderfully with bread. This is a simple yet satisfying option for backpacking meals.

15. Summer Sausage:

For additional calorically dense food ideas, your best bet is to pair your cheese with things like olive oil or summer sausage. These combinations can provide the extra calories needed for those hard hikes.

16. Chili Powder:

Even without bringing fresh foods, you can add a great way to kick up the flavor of your favorite meals with chili powder. It pairs wonderfully with a spicy Monterey Jack or a robust, best hard cheese for backpacking.

Just a sprinkle can take your cheese from simple to sizzling, making it a must-have spice on your backpacking trip.

Pairings Conclusion

Remember, whether it’s hard, soft, semi-soft, or semi-hard cheese, or even dehydrated or canned options, the best cheese for backpacking is the one that complements your other food items and satisfies your taste buds after a long day of hard hiking. Enjoy the wilderness, and bon appétit!

Weight Considerations – Best Cheese for Backpacking

When planning a backpacking trip, weight considerations are paramount. Each item you bring along contributes to the load you’ll be carrying, including the food you pack. Selecting lightweight, calorie-dense foods is essential, and cheese, fits the bill perfectly.

The weight of cheese is primarily determined by its moisture content, which is reduced through the aging process.

Hard cheeses are aged for longer periods, which results in less moisture and, consequently, less weight.

This makes them a perfect choice for those looking to minimize their pack’s weight without compromising on taste or nutrition.

Interestingly, despite their lighter weight, hard cheeses often pack a higher calorie punch. This is because the aging process also concentrates the cheese’s flavor and caloric content.

In essence, a small amount of hard cheese can provide the same number of calories as a larger quantity of softer cheese, meaning you don’t need to bring as much food to meet your energy needs.

When comparing the weight and calorie content of various types of cheese, hard cheeses like Parmigiano-Reggiano, Pecorino Romano, and aged Gouda typically provide the best calorie-to-weight ratio.

For instance, a one-ounce serving of Parmigiano-Reggiano contains approximately 110 calories, while the same serving size of Brie, a soft cheese, contains around 95 calories.

However, due to its lower moisture content, the hard cheese weighs significantly less, making it a more efficient choice for backpacking.

When choosing the best hard cheese for backpacking, it’s important to consider both the weight and the calorie content of the cheese.

Hard cheeses, due to their aging process and concentrated caloric content, tend to be the best choice for those looking to optimize their pack weight while ensuring they have a high-energy, satisfying snack on the trail.

Shelf Life and Storage – Best Cheese for Backpacking

Understanding storage and shelf life is key when choosing the best cheese for backpacking. Not all cheeses are created equal when it comes to enduring the rigors of a backpacking trip, especially when dealing with varying temperatures and warm weather.

Opting for cheeses with a longer shelf life can make all the difference in maintaining freshness and flavor throughout your journey.

Hard cheeses typically have a longer shelf life compared to soft cheeses, making them an ideal backpacking food. Less surface area exposed to air also helps in maintaining their quality.

In hot weather or warmer weather, the best hard cheese for backpacking should be able to endure without refrigeration.

Proper packaging is essential to store cheese effectively during your next camping trip. If you buy cheese in its original packaging, it’s best to keep it that way until it’s time to eat.

Once opened, wrapping the cheese in parchment paper before placing it in a plastic bag or plastic wrap can help preserve its flavor and texture.

In case you are dealing with colder climates, an airtight container could also be beneficial to protect the cheese from moisture.

Individual packets of cheese can be a great option, too. They are not only convenient but also help minimize the cheese’s exposure to air, thus extending its shelf life.

Cold water can help keep cheese chilled but you need to be very careful, especially with soft cheeses, to avoid any food poisoning issues.

However, if soft cheese is a must-have on your list, selecting shelf-stable options would be the best way. These can withstand room temperature for a longer period, but once opened, they should be consumed within a few days.

When packing for warmer weather or humid weather, consider wrapping your cheese in wax paper, which allows it to breathe while protecting it from external elements. Be mindful of the cheese’s location in your pack, as placing it near a cold water bottle can help keep it cool during hikes.

A little planning goes a long way when it comes to storing and packing the best cheese for backpacking. By understanding the different types of cheeses and their respective storage needs, you’ll be well-equipped to enjoy a variety of delicious cheeses on your outdoor adventure.

Conclusion:

finding the best hard cheese for backpacking can greatly enhance your outdoor adventures, adding both flavor and nutritional value to your meals.

By considering factors such as shelf life, weight, and flavor, as well as potential pairings, you can elevate your backpacking cuisine from merely sustenance to a truly enjoyable part of your trip.

Remember, the best hard cheese for backpacking is subjective and depends on your personal preferences and dietary needs.

Whether it’s the sharp bite of an aged Cheddar, the nutty complexity of a Parmigiano-Reggiano, or the creamy mildness of a young Gouda, your choice of cheese can make all the difference.

Finally, don’t forget about the other types of cheese that can be excellent choices for your trip.

While the best hard cheese for backpacking often takes the spotlight, semi-hard, semi-soft, and even some soft cheeses can also be fantastic options, offering a wider range of flavors and textures to enjoy.

So, the next time you plan your backpacking trip, don’t underestimate the power of the humble cheese. Armed with this guide, you’re well on your way to discovering the best hard cheese for backpacking that will not only fuel your journey but also delight your taste buds.

Happy trails and bon appétit!

33 Best Meats for Backpacking That Taste Great

33 Best Meats for Backpacking that Taste Great

I love backpacking. Both in the United States and abroad. After college I hiked sections of the Pacific Crest Trail and hike on the Appalachian trail regularly.

Backpacking is an adventure pure and simple. It allows you to immerse yourself in nature, challenge yourself physically, and disconnect from everyday life.

The best meats for backpacking are shelf stable, nutritious, and delicious. But some meats are much better than others when you consider important stuff like weight and durability. When it comes to food, packing light is ESSENTIAL. You don’t have the space.

That can be quite a challenge on the trail. You need food choices that don’t spoil quickly, yet provide you with the energy needed to keep you going. This food should also taste good.

That’s where meat comes in. Meats are a great source of protein and essential nutrients. They also have high caloric density. Crucial for maintaining energy levels when you have to spend all day going straight uphill.

Enough Meat to Feed an Army of Backpackers

I’ve assembled 33 meats for backpacking that will help you go that extra mile on your next backpacking trip. Many of these meats can stay at room temperature. You can pick them up in almost any grocery store, like Trader Joe’s or on Amazon. So read on and munch away!

33 Best Meats for Backpacking:

1.    Smoked Salmon:

Smoked salmon is a great option for summer backpacking trips. It’s high in protein and healthy fats and doesn’t require refrigeration. I absolutely love smoked salmon for it’s rich umami flavor. While it’s delicious on it’s own, you can also eat it with crackers, on bread, or add it to a pasta or rice dish! So many amazing options.

Smoked Salmon is one of my favorite meats for backpacking!

2.    Summer Sausage:

Summer sausage is a great option for hikers looking to pack in much-needed calories during a day hike. This cured meat is rich in protein and fat, providing a great source of energy for extended outdoor activity.

You can eat summer sausage in a sandwich, on it’s own, or pair it with crackers and cheese for a delicious trail meal. While it’s easy to pack and requires no refrigeration, it is heavier than some of the other options so it might not always be the go to choice for longer backpacking trips.

3.    Beef Jerky:

This is perhaps the most well-known and beloved meat snack amongst hikers and backpackers. This shelf-stable meat has a very long shelf life and can be stored in a backpack for long periods of time without spoiling.

Made from lean cuts of seasoned beef, it’s high in protein and low in fat. There is a reason beef jerky is the go-to choice for many backpackers. It can be eaten as you walk, or on a quick water break. It can also be thrown in other foods for a little added texture and protein boost!

Beef Jerky is one of the most commonly seen meats for backpacking.

4.    Pepperoni:

Pepperoni is a great way to add some variety to your backpacking meals. Classic pepperoni is made from cured pork, but there are other types of pepperoni too like turkey pepperoni and even plant-based pepperoni.

Because pepperoni has spices like paprika and garlic, it’s an awesome way to add some flavor to your food without a lot of extra weight or effort. Make a backcountry pizza on a tortilla or add it to a pasta dish for a kick of flavor.

5.    Dry Salami:

It doesn’t matter whether you’re a seasoned backpacker or a first time hiker, you have probably already thought about dry salami as one of the best meats for backpacking. This tasty cured meat is shelf-stable and requires NO refrigeration.

It’s also high in protein and fat, so you’ll get that quick burst of energy needed to summit the mountain. I haven’t cooked a lot with dry salami but it’s excellent by itself or as a pre-meal appetizer while you’re waiting for that Mountain House to hydrate.

Add sliced salami to your meats for backpacking list

6.    Dried Fish:

While not super popular in the United States, dried fish is very popular in other countries. This protein-rich, low fat food is made by air-drying fish – typically cod. It’s got a long shelf life and is a great option for backpackers looking for a nutrient-dense, lightweight food.

Vikings have eaten dried fish for centuries. In fact, we talk about dried fish in our article titled “Greatest Icelandic Foods You’ll Want to Feast On.” The Icelanders eat theirs with butter. So whether you’re exploring Iceland’s rugged wilderness or backpacking across the United States, dried fish could be a good addition to your meal plan.

7.    Prosciutto:

I think prosciutto is one of the best cured meats that can be found in most grocery stores. This Italian dry-cured ham is salted, air-dried, and aged for several months. This results in a tender meat you can enjoy on it’s own, or add to a sandwich or salad.

It’s rich in flavor and will definitely elevate your trail cuisine. It often needs to be kept at lower temperatures though so check on the type of prosciutto you’re getting to make sure it holds up to your expedition.

Prosciutto is definitely one of the more expensive (but tasty) meats for backpacking

8.    Pre-Cooked Bacon:

When I think of bacon, I think of trail breakfasts. A crispness in the air and a hot cup of coffee.

Pre-cooked bacon allows you to quickly and easily cook yourself up a filling breakfast before putting some miles under your feet.

Because it is one of those shelf stable meats, you don’t have to worry about keeping it cold. It’s also very lightweight so it’s not too troubling to pack.

It’s not fresh bacon, but it’s pretty dang close

9.    Bacon Bits:

Bacon bits are a great starting point to incorporate more meat into your trail meals. They’re small, light, and easily sprinkled onto various dishes from eggs, to pasta, to freeze-dried meals.

Their long shelf life mean you don’t have to worry about spoilage. And they pack a punch in flavor. Unlike prosciutto, they’re also very inexpensive.

10.  Dehydrated Meats for Backpacking:

Dehydrated Meats (not to be confused with freeze dried meats) are a popular option when exploring meats for backpacking.

They’re lighweight, nutrient dense, and don’t require refrigeration. The drying process removes all the moisture which makes it shelf stable AND intensifies flavors.

Instead of buying meats for backpacking, make your own! To make your own dehydrated meat, all you need is a food dehydrator, some high quality meat, and a Ziploc bag.

You can experiment with different cuts and seasoning blends to create your own recipes. Or find recipes online people have already perfected like this one. Dehydrated meats for backpacking are also a great addition to trail mix, soups, and stews.

But yes, it is good as a snack by itself. If you plan on backpacking a lot, a food dehydrator is a cost-effective way to make some great tasting, light weight, backpacking meals.

11.  Canned Salmon:

Canned salmon (or salmon fish pouches) are super convenient, low fat, and protein packed. It’s also a great source of omega-3 fatty acids which are good for heart and brain health.

When it comes to backpacking, the salmon pouches are definitely the way to go so you don’t have the weight and you don’t need to carry a can opener. You can mix canned salmon into rice or roll it up in seaweed wraps for trail “sushi”.

12.  Canned Tuna:

Canned tuna is a staple for many backpackers because tuna pouches are so dang convenient! The best thing about canned tuna is its versatility. It can be used in so many ways to create satisfying meals.

Tuna pouches these days are served in so many different ways. Flavors like lemon pepper, ranch, buffalo sauce, and thai chili ensure you’ll never get bored. You can add it to rice or pasta and have yourself a great backpacking meal, or pair it with crackers for a great trailside snack.

Remember the pouches when looking for lighter versions over the cans

13.  Freeze Dried Meats for Backpacking:

Freeze-dried meats like ground beef, freeze-dried chicken, pork, and other types of freeze-dried meats have become increasingly popular amongst backpackers due to their lightweight and easy-to-pack nature. You can get freeze-dried meats in bulk on Amazon.

You can then make your own recipes. Just mix the freeze-dried meat with salt and spices and other freeze-dried foods (rice, veggies, etc).

Mix it up and put them in a sturdy plastic bag. You can rehydrate them with cold or hot water on the trail. It’s cheaper than the individual packets but you still get all the pack weight benefits. If you rehydrate with cold water, you can eat it cold or heat it up on a pot in the backcountry.

14.  Canned Chicken:

Canned Chicken is on our meats for backpacking list because it is a quick and easy protein option for backpackers. Again, don’t use the cans, just get the foil chicken packets. They are much lighter.

Canned chicken is affordable and available in most grocery stores. You can use mayo packets to make a chicken salad, or add the chicken to soups you make on trail (bouillon, water, chicken). If you’re not a fan of canned fish, you might try out chicken and see what you think.

15.  Duck Jerky:

Of the various meats for backpacking, duck jerky is more expensive and harder to find that beef jerky. With that said, it’s flavorful and filled with protein. Like other types of jerky, duck jerky is a dry meat with a long shelf life. It’s lightweight and good for a snack. It’s got a chewy texture and is somewhere between beef and turkey jerky.

16.  Vienna Sausages:

Alright alright, I can hear all the Vienna Sausages haters coming out of the woodwork right now. But nearly every grocery store and even gas stations have Vienna sausages – so someone has to be eating them.

They’re basically like canned mini hot dogs and plenty of people grow up eating these. You can add them to pasta, eat them with saltines, and kids like them.

While you may worry about letting your hiking buddies catch you with a can of Vienna sausages in your pocket, I say Hike Your Own Hike.

If Vienna sausages are your thing, carry on. Besides, there is an entire reddit community devoted to ways to prepare them. Embrace the Vienna sausage and enjoy your hike!

17.  SPAM:

While you’re on a canned meat products roll, how can we forget about SPAM. It comes in foil packets as well as cans. SPAM is one of the most popular dishes in Hawaii. It’s served in McDonalds there. Why? It’s versatile and tastes great fried.

SPAM is great for breakfasts on the trail and can be used as part of a ham sandwich or the Hawaiian way – SPAM and rice. So don’t discount this classic meat product when it comes to stocking up for your next backpacking trip. You just might become a die-hard SPAM fan swearing by its savory and salty flavor!

18.  Pemmican:

If you’re looking for a traditional backpacking food that’s been used for centuries, look no further than pemmican. Pemmican is a mixture of dried meat, fat, and berries. It was developed by Native Americans as a high-calorie, nutritious food that could sustain a human on long journeys.

I like to think of it as the original trail mix. Pemmican has a long shelf life and can be made at home with a few simple ingredients. It’s low carb, medium protein, and high fat.

Of this list of meats for backpacking, Pemmican is older than almost everything but smoked meats. Pemmican is a time-tested backpacking food that’s got excellent nutritional value and enough calories to keep you going, consider making some pemmican.

19.  Meat Bars:

Protein bars or energy bars have grown in popularity amongst the outdoor travel community. Meat bars however, are relatively new to the stage. It’s more savory than other protein bars.

Of the meats for backpacking, it’s one of the easiest to eat. And it’s made entirely of meat like bison, beef, or turkey. So they’re obviously packed with protein.

You can find them in a variety of flavors like teriyaki or spicy. Meat Bars can be purchased online, at REI, or even at Whole Foods or Trader Joe’s. One great thing about meat bars is they’re filling with absolutely no cooking required. This makes it a quick, tasty, and easy lunch.

20.  Biltong:

If you haven’t heard of Biltong, let this be your introduction. It’s a South African style dried meat and an excellent alternative to beef jerky. Before being air dried, Biltong is marinated in spices and cured in vinegar.

This make the meat very flavorful and tender. The unique preparation gives it a very distinct taste and it’s definitely worth trying out. You can find biltong in specialty stores or online. But if you have a food dehydrator and a little talent in the kitchen, you can make a version at home.

Biltong – Meats for Backpacking from South Africa!

21.  Salmon Jerky:

Meats for backpacking can often get an unhealthy rap, but that’s not the case for salmon jerky. Salmon jerky is made from lean cuts of salmon that are seasoned, dried, and smoked to perfection.

It’s a healthy and delicious snack for your next outdoor adventure. If you prefer seafood, salmon jerky is a great alternative to the land-based meats.

22.  Chorizo:

Chorizo can be another fantastic choice when deciding meats for backpacking trips because it’s flavorful and shelf-stable. Made from ground pork, chorizo is a blend of spices like coriander, garlic, and chili powder.

It adds a savory kick to any dish and is great for breakfasts or dinner. You can add it to pasta sauce or scrambled eggs. Just remember to wrap it up in a paper towel to absorb excess oil as chorizo can get kind of oily.

Chorizo – Meats for Backpacking from Spain!

23.  Dried Shrimp:

I know it sounds ridiculous but dried shrimp is the ULTIMATE backpacking ingredient if you want to add some serious umami to your meals. These little crustaceans don’t seem glamourous, but they pack a punch when it comes to flavor.

You can mix them with rice or boil them with bouillon cubes in hot water to make a flavorful broth. They’re just a great addition to any meals. While the smell can be a little odd for the uninitiated, the taste is oh so worth it. Trust me.

24.  Pork Rinds:

Pork rinds, also known as chicharrones, are a good option for backpackers looking for a crunch and savory snack. These crispy fried pork skins are high in protein, low in carbs, and reminiscent of potato chips.

While they are very light, they can be pretty bulky, which makes it challenging for backpacking. They also can get smashed on a long hike. This isn’t necessarily a bad thing though, just use them to coat the SPAM and fry up a trail schnitzel!

If you’d like to keep your pork rinds whole, just put them in a Tupperware.

25.  Canned Sardines:

Canned sardines are another potential option on the trail. You can put them on crackers or bread, and they come in all sorts of different flavors.

If you’re a fish fan and have yet to try canned sardines, I think it’s worth exploring. There are some great recipes online.

Sardines in Olive Oil – Meats for Backpacking

26.  Soppresatta:

Soppressata is a traditional Italian cured meat and a great addition if you’re looking for meats for backpacking. It’s high in fat and protein and perfect for a snack at the summit with some wine and a loaf of french bread.

27.  Calabrese:

Calabrese salami is one of the best meats for backpacking. It’s a dry-cured Italian sausage known for its bold and spicy flavor. We’re talking fennel, garlic, red pepper flakes and black pepper.

One of the good things about calabrese is they chewy texture. It’s similar to pepperoni and definitely a versatile trail food that can fuel any adventure.

28. Bier Sticks

If your hunt for meats for backpacking continues, check out Bier sticks. Bier sticks are small, flavorful sausages that are a good source of protein. They’re originally from Europe, and almost look like a really high quality slim jim.

29.  Canned Corned Beef:

Unfortunately, I’ve yet to find any canned corned beef in foil packets. If your luck is similar to mine, that means you’ll likely need to pack out the can – which is extra wright. As such, canned corned beef might not be the best option for longer backpacking trips when ounces matter.

But if you’re on a short weekend trip, it can still be a delicious option. Just be sure to follow leave no trace principles!

If you haven’t had canned corned beef before, try and fry it up with some potatoes for a delightful hash!

30.  Smoked Meats:

Smoking meats is one of the oldest preservation methods known to man. If you’re into smoking meats, this can be a wonderful method to preserve your meats for backpacking and keep them fresher for longer.

Smoke adds a rich flavor that always seems to taste better on a trail. Smoked turkey, beef, and of course salmon, are all popular choices. I’ve also met hunters who smoked elk or deer and took the meet with them on hikes.

Remember, smoking alone isn’t enough to keep meat fresh so be careful with the method you choose and make sure you’re doing everything safely.

Smoked meats for backpacking can be a delicious way to add some variety to your menu

31.  Backpacking Meals with LOTS of meat.

Freeze-Dried backpacking meals with LOTS of meat can also be purchased online. While these trail meals can be expensive, there are a number of companies that make their freeze-dried meals with extremely high quality ingredients.

One of my personal favorites that I eat on many of my adventures is Next Mile Meals. These low carb, high protein meals are so good. It’s hard to tell they were originally freeze dried. I love wrapping their breakfasts in a low-carb tortilla or their meatball marinara is maybe my favorite backpacking dinner.

Other great companies that provide meats for backpacking in their meals include Packit Gourmet and Backpacking Chef. Both have a wide selection of meat forward recipes. And because we all know people with dietary restrictions, the Outdoor Herbivore offers some good plant-based options with plant-based meat. Outdoor Herbivore also has gluten free meals.

32. Smoked Oysters:

Smoked Oysters can be thrown in a soup, or smeared on a cracker with some hot sauce. They’re typically steamed fresh and then packaged in olive oil. Once you pop open the can though, they can definitely be a little fragrant when you’re in bear country. And you’ve got to pack out the can again. But they are Oh. So. Good.

33.  First-Night Meats:

What is a First-Night Meat*? It’s the meat you eat on the first day of your backpacking trip of course! It’s the one night where you can indulge in some fresh meats without worrying too much about refrigeration.

Fresh foods typically don’t stay good for more than a couple days and it’s important to handle raw meat and/or cooked meat carefully.

But on the first night, you can pack it with ice to avoid food poisoning and keep it at a lower temperature. The best way to do this is to freeze Nalgene bottles and use them as ice packs. You can also just fill up a ziploc with ice cubes and dump out the water on trail.

While steak is great, leave the cast iron OUT of the backpack

Roast beef is a popular choice for a hearty sandwich for your first lunch on trail and stays relatively cold.

For dinner, consider heating up some chicken kabobs, beef kabobs, or hot dogs over a fire. You can pre-cook these before hitting the trail, and even take them out of the freezer the morning of your hike so they stay colder longer. So get creative on your first night and think about what delicious first-night meats* you’ll have.

*First night meat is totally going to be trademarked by Travel by Rayl.

BONUS: Dehydrated Eggs and Hard Cheeses

Okay I know that dehydrated eggs and hard cheese are not exactly meats for backpacking, but they are great additions to any backpacking meal.

Hard cheeses like cheddar or parmesan can go without refrigeration for longer periods of time. Check out our Best Cheeses for Backpacking article!

Dehydrated eggs are easy to rehydrate and can be combined with pre-cooked bacon, SPAM, or smoked salmon for some pretty great trail breakfasts. Both cheese and dehydrated eggs take up very little space for the flavor they pack.

Dried Cheese Crisps are another great way to add cheesy crunch with little to no carbs.

Sauces and Spices to Pair with Meats for Backpacking.

  • Hot Sauce
  • Olive Oil
  • Garlic Powder
  • Soy Sauce
  • Nut butters – (nut butter packets or nut butter packs like peanut butter or almond butter)

Sides to Pair with Meats for Backpacking

  • Fresh Veggies: (No refrigeration needed)
  • Ramen Noodles
  • Rice
  • Pasta
  • Tortillas
  • French Bread
  • Instant Oatmeal
  • Sunflower seeds (added crunch)
  • Dehydrated Meals (just add meat!)
  • Fresh Fruits
  • Freeze-dried fruits

Drinks to Pair with Meats for Backpacking

  • Water
  • Wine (Anyone else love summit wine?)
  • Beer
  • Crystal Light
  • Tea
  • Coffee
  • Bourbon

Tips when Carrying Meats for Backpacking

A. Bears

When you’re backpacking in bear country remember…you love your meats for backpacking and bears love your meats for backpacking. To keep both you and the bears safe, store your food properly.

Bear bags are lightweight and can be strung up in trees. Some areas of the country where bears have gotten too clever now require bear canisters. They’re heavy but it’s important to protect your food from the wildlife. On the bright side the bear canisters make a great seat. So check where you’re backpacking to learn the bear requirements.

B. Food Weight

One of the biggest mistakes some backpackers make is to bring too much food. You want enough food to sustain yourself but food weighs a lot. Excess food takes up valuable space and weighs a ton. If you overload on meats for backpacking, you’re not going anywhere.

Consider swapping your cast iron for a lighter frying pan or water-logged foods for their dehydrated brethren. Your back and legs will thank you.

Conclusion

Choosing the right meats for backpacking can make your experience. Meats are high in protein, and usually have a good calorie to weight ratio.

While it can be tempting to bring tons of delicious fresh meat, often the lighter freeze-dried or dehydrated stuff can be almost as good. And you can always add more flavor with spices and harder cheeses. And besides, the trail and a bit of hunger add their own seasoning. You might even have some weight loss.

By making smart choices in your meats for backpacking, you can bring meat camping and still have a safe and delicious camping trip. See you on the Trail!

Read our Best Cheeses for Backpacking post!

Genuine Review of the iKamper Rooftop Tent

Introduction – Review of iKamper Rooftop Tent

First, I AM NOT an iKamper affiliate. Whether you buy it or not is entirely up to you. Click the links in the page…or don’t – unfortunately, I won’t receive any money either way. 🙂

I love my iKamper Rooftop Tent So what was I to do? Well write an iKamper Rooftop Tent Review of course!

As a frequent camper and overlander, I’m always looking for ways to make my adventures better. We all want to spend more time exploring the outdoors and less time setting up camp. In that regard, a rooftop tent seems like a logical addition to any nomadic lifestyle.

I’ve tried various rooftop tent set-ups over the years. Nothing seemed to offer that PERFECT balance of convenience and comfort. That is, until I got the iKamper.

The iKamper is a hardshell tent that you can place on both larger vehicles, and/or smaller cars. In 2018, iKamper won the prestigious Red Dot Design Award from Germany.

I was immediately drawn to the iKamper due to its unique design features. The exterior comes in two colors:

1. Shiny black (that scratches)

2. Rocky black (which is scratch resistant but more expensive).

I was feeling bougie and went with the rocky black iKamper mini 2.0. For those who don’t know, the iKamper Mini is a similar design to the iKamper Skycamp 3.0 with a couple differences. The mini sleeps two people, the regular iKamper sleeps four people.

I’m a year-round camper. I’ve slept in the iKamper in all sorts of weather conditions. From frigid winter nights up through ultra-warm summer nights – I’ve seen it all. Sometimes, the wet or snow-covered ground doesn’t make for a good night’s sleep. That is what makes sleeping in a rooftop tent great. You’re literally above it all.

For solo travelers, the mini in particular is very easy to set-up and take down by yourself.

I also did not want my iKamper to fall off the roof while driving. Fortunately, iKamper provides mounting brackets. They fit onto any roof rack, no matter what car you have.

History of iKamper:

The iKamper was developed in South Korea. It was the brainchild of Soon Park. He wanted to design the best overall rooftop tent with the space of a softshell. It also needed the convenience of a hard shell.

He started a Kickstarter campaign to try and raise $100,000 USD…he raised $2.3 million USD. Thus, began iKamper’s entry into the rooftop tent market – officially entering the RTT Scene in 2014.

Regular Size Black iKamper

Installation – iKamper Review:

Over the course of about 45 minutes, a friend and I were able to attach the iKamper to the top of my wrangler. Of course, the iKamper needs a separate rack system.

After some research I went with Exposed Racks. I liked that the racks hook into my gutter system. They didn’t require drilling which was also great. And they use disbursement techniques to avoid cracking my rooftop…which would suck…

Given that I’ve been using the racks for two years and about 15,000 miles, I can honestly say they work great. Their customer service is also good. They worked with me to learn the exact Jeep I have and which system I needed.

The iKamper mini holds two full grown adults, some gear, and of course, the puppy dog. Exposed Racks will help you no matter the car, from a Toyota Tacoma to Mini Cooper or Subaru Outback.

Now that I’ve installed it once, installation on and off is easy. The iKamper requires at least two adults for the mini. I’d add another adult if you have the full size iKamper.

While I rarely take the iKamper off of my Jeep because I am a 4-season camper, it’s very easy to take off and on. Some owners have really cool garage set-ups that hoist the iKamper off the top of their car. They only need one person for that.

If you want it installed for you, there are several options. You can pick up your iKamper Rooftop Tent at their facility in Kent, Washington and they will help you.

Or, in Colorado, people often use Lee Hoffman at Altitude Industries. Altitude Industries is an authorized seller for iKamper and they do good work.

Again, I had it shipped to my house and did it myself. It was a very simple setup and iKamper has a YouTube video that will walk you through the whole thing. No problem.

Drivability of the iKamper Rooftop Tent:

My Jeep Wrangler is not built for speed. Jeeps are a force to be reckoned with on mountain roads, but the American Highway system is not where they shine. The iKamper Rooftop Tent does not help this situation. If there was a drawback to any hard shell tent, including the iKamper, it would be this.

When my Jeep hits highway speeds 75mph the iKamper has a high-pitched whistling. I resolve this problem by slowing down slightly, but it’s still a bit annoying at times.

For an additional $149 USD, you can buy a wind deflector to improve the aerodynamic nature of the tent. It also will increase gas mileage, and decrease the high-pitched whistling. When it comes back in stock (it is out of stock right now) I’ll probably do this and let you know how it goes.

While I have a Jeep, plenty of people put the iKamper on anything from a Toyota Highlander to a Mini-Cooper. Unlike larger tents, the compact design of the iKamper works on any vehicle. One reason is because the telescoping ladder is adjustable to any height.

The iKamper Mini Rooftop Tent with my dog Loki

Weight of the iKamper

The iKamper Mini weighs 125lbs (56.6 kg), the full size weights 163.1lbs (74kg).

Remember, every car has different vehicle load restrictions the rack system can support. This changes based on if the vehicle is moving or not (weight limit goes up if the vehicle is still). You need to know your rooftop load limit.

The lightweight design of the iKamper Rooftop Tent is no problem if your rack system is set up well.

The rack needs to be rated for the weight of the iKamper and the people in it. If you’re not sure what your vehicle rack rating is, you can find it on the manufacturer’s website.

Some racks require you to drill into the body of the car, others are designed to attach in other ways. You may need aftermarket racks, rather than any stock racks, that came with your car.

iKamper Mini

Interior of the iKamper Rooftop Tent:

The interior is one of the places where iKamper shines. The spacious design interior has several features which make it a winner. It somehow feels bigger on the inside (like the TARDIS! – Dr. Who anyone?).

With plenty of room for our small family (my dog, my fiancé and myself) the iKamper Skycamp mini is more than enough for us. If our family grows, we’ll likely retire from two-person tents and look at different models.

Maybe the X model, or other Skycamp models like the Skycamp 3.0. The king-size mattress pads in these versions would become a necessity at that point.

In the interior space, the back of the tent has a pretty striking world map. While not necessary, I appreciate the interior design elements. It marks the attention to detail iKamper has in their products.

It also provides ample conversational fodder for discussing next adventures.

The iKamper comes with a stock mattress. I’ve always thought it provided a very comfortable night’s sleep. Conversely, some people like to replace the stock mattress with the REI Exped mattress. They had some complaints about mattress thickness.

The newest 3.0 version has an updated thick mattress that people are raving about. The thicker mattress pad is great. When combined with the different shape of the roof, you still have plenty of space for storage. And you get max cushion for comfort.

The tension poles that assist in opening the iKamper hold it open very well. In high wind situations, iKamper provides clamps to place on the tension poles in heavy winds. They ensure the tent doesn’t close down on you.

Fortunately, I have not needed to use the clamps yet, but I do appreciate the thoughtfulness. I am not interested in getting sandwiched…

The hardshell roof provides a nice element of security when traveling solo. The side windows and skylights of the interior have several layers:

  • A see-through plastic clear vinyl layer
  • A screen that allows wind through
  • A waterproof fabric layer. This also completely blocks out the sun – and the eyes of any nearby campers while you’re changing. Again, great for solo travel.

Underneath the windows on either side of the tent are storage pockets. These provide extra space for storing phones, water bottle or battery packs.

I especially like the skylight! It has all the layers above for rain but I like to sleep with it open. I can star gaze all night or quickly close it up if the weather (or mosquito situation) changes.

Interior of my iKamper Rooftop Tent with the Strip LED Lighting (avail on Amazon)

Exterior of the iKamper RTT:

Shell/Ladder:

The exterior hardtop of the iKamper comes in two colors: Black Shell, and Rocky Black Shell. The Black Shell is shiny and looks good. BUT tree branches, gravel, and dust will scratch it over time. The rocky black shell is a rhino-lined material and is pretty indestructible.

I’ve had mine for a couple years now and it still looks new. The Rocky Black is an additional $280 USD for the iKamper Mini and an additional $300 USD for the larger iKamper 3.0.

The telescopic ladder of the iKamper is great. It’s easy to set up and simple to climb.

Exterior Fabric:

The exterior fabric is a water resistant, thick, gsm poly-cotton canvas. On the newest iKamper it is a gorgeous charcoal gray.

Personally, I think this is a marked improvement over the earthy brown and red concept of the original design. But really, the outdoors is far more about functionality and reliability than aesthetic. Either color works wonderfully in that regard.

The rainfly is 100% waterproof and works wonderfully. The zipper system is also waterproof which keeps rain out. Getting dry and staying dry is crucial to survival in outdoor situations.

I have been in all sorts of rainstorms and snow storms with my iKamper and have stayed completely warm and dry in my tent the entire time.

Set-Up of the iKamper Rooftop Tent

The iKamper sets up in about one minute. It is great for road trips. I drove across the United States – from Washington State to Washington D.C.- with my iKamper, without any hotels. For the most part, I stayed in National Forests and National Parks, often arriving late at night – exhausted – after a day of driving. The easy setup of the iKamper was a great feature.

Within 60 seconds, I pulled the telescoping ladder onto the passenger side of the car. The iKamper was now open and set-up. In another minute I laid out my sleeping bag and pillow. A few minutes later, I was relaxing next to a campfire with a small glass of bourbon.

The ability to set-up the tent quickly, and break it down quickly, was a huge selling point for me. It is something that makes this a fantastic rooftop tent.

We’ve all arrived to campgrounds in the middle of the night set up a ground tent with a lantern or the headlights of our car. Compared to a ground tent, this simple one-minute setup feels luxurious.

iKamper Rooftop Tent Set-Up With Rain Canopy

Take-Down of the IKamper Rooftop Tent:

Take-down is fast – although not quite as fast as set-up. Initially it took me about 5 minutes to take the tent down. Now that I am well practiced, it takes closer to 3 minutes.

Why the additional time? I think it predominantly comes down to one thing. The fabric sometimes gets caught when the tent is about 2 inches from closing. It’s not a big deal. You just need to step up on the tire, tuck it up inside the tent shell so it doesn’t get caught, and close it the final few inches. If you have a smaller car, you wouldn’t even need to step on the tire.

If I know I won’t be using the tent for a while, I’ll brush any dirt off the ladder. I don’t know if you can put the rooftop tent away wet but I would not. If I have to break camp when it is raining, I always make sure to open it up at the next available sunny day. If we have days of rain, I take it into a large covered parking area to wipe off the rain.

I would do this with any gear I have though. Mildew and I don’t get along.

Accessories for the iKamper Rooftop Tent:

Annex and Awnings

iKamper is very good when it comes to accessories and they’re always coming out with new things. Some of the accessories currently available include awnings and annex room. These are rooms attached to the iKamper that give you a huge interior, or covered, space.

While these add time to the set-up of the tent, if you are stationary for several days, they are nice. It’s great to have an area to relax out of the sun/rain.

Shoe Storage

I’ve already mentioned I got a free shoe storage rack from iKamper due to a delay in shipping. I like it for keeping shoes out of the tent and keeping your shoes off the ground so critters don’t get in them. It’s not a game changer, but it’s a nice to have.

Stair Attachment

One of the accessories I am most interested in getting is the iKamper stair attachment. While I have no problem scrambling up and down the ladder into my iKamper, my dog needs to be lifted up and down each morning and evening. I’d be great to have a stair attachment to the ladder so he could climb up each night by himself.

Winter Insulation Lining

I have a few accessories for my iKamper. The first is the winter insulation lining. I don’t use it very often because it takes a little time to set-up or take down the next day and you don’t have as much space. However, if it’s positively glacial outside, I’ll set it up. At that point I think it is a good idea to use the winter liner. It works by creating an additional layer of air insulation between you and the outer layer of the canvas panel. Your body heat warms up the interior and voila! Toasty!

With the lining inside, I am more than comfortable in below freezing temperatures. While the lining makes the interior smaller, there is still enough room to move about the tent or play a game. You also still have the same easy access to the outside and access to all the canopy windows.

Outer Storage Shelf

Another accessory that looks quite nice is the outer storage shelf. It is made of the same canvas tent fabric as the exterior of the tent. It acts as outside storage for toiletries, soap, and anything else you can think of. Organization is key and this helps in that regard.

Customer Service – iKamper Review:

I have only had great experiences with iKamper customer service. I had a shipping issue upon ordering the iKamper. It was not delivered when I had hoped and I was moving across the country the following day. Obviously, I contacted iKamper immediately.

Upon hearing the situation, they overnighted the tent at no additional cost to me. They even threw in a free shoe rack accessory as an apology for the delay. The company is friendly, accessible, and committed to making great camping products.

The iKamper Rooftop Tent camping overlooking the Badlands National Park (and my dog Loki)

Pro-Tips for the iKamper Rooftop Tent:

The iKamper is DARK at night, and occasionally during the day if the blackout curtains are closed. You can add some light to improve the experience.

Many iKamper customers, including myself, purchased some sticky LED light strips. to place on the interior for lighting at night. It’s great for playing card games in the evening and not hitting your head on a dangling lantern.

While I have not done this, some people place sticky carpeting in the bottom of the iKamper. They swear that it helps with condensation and makes the entire space more comfortable. I avoided it thus far because carpet always seems challenging to clean while camping.. It does look cozy though! Besides, anything that makes the iKamper a more comfortable place to sleep can only be a good thing!

Potential Drawbacks – iKamper Review:

It’s hard to come up with things I don’t love about the iKamper but here are a few drawbacks:

Price:

I think the main drawback is the price range. The four-person Rocky Shell iKamper 3.0 comes in at a whopping $4,499 USD. The regular Black Shell is $4,199 USD. The two-person iKamper Mini Rocky Shell is $3,979 USD and the regular Black Shell is $3,699. If you add this onto an annex costing $880 USD, the bill adds up quickly. Despite the price, iKamper appears to be doing very well. I attribute this to their laser like focus on quality and customer service.

Solar Panels:

The next drawback is solar panels. The curvature of the top of the tent, and a center “mohawk” assists with aerodynamics, but it’s challenging to mount a solar panel like a Goal Zero. The only thing I’ve been able to find that’s been designed for the iKamper is a small third-party solar panel called a Solar Hawk.

Some people have had some luck with other flexible solar panels. But when other hard shell roof top tents have brackets for mounting a Goal Zero, it’s a negative for iKamper. I’d like iKamper to consider adding some brackets the 4.0 design. Otherwise, the top of the tent just seems a bit underutilized.

The other option here if you are considering a mini, is to check out the new iKamper Blue Dot Voyager Duo. It’s a do-it-yourself rooftop tent that you can put a solar panel on. It could be a great choice for DIYers who want a fully customizable hard-shell tent.

Storage

One of the biggest complaints about the 2.0 version was that it was hard to close the tent with your gear inside of it. Unpacking and repacking it added an extra step if you were traveling each day. iKamper listened to the issues and the 3.0 version is more spacious on the interior for gear storage. I’ve no doubt that with each new version, iKamper will continue to get better.

Other Alternatives:

A lot of people looking at the iKamper 3.0 also consider the Roofnest Condor XL. While I haven’t personally used the Roofnest Condor, it seems like it could be the best option for a young family looking for a RTT at a slightly more affordable price point.

Camping on New Years 2023 with my fiancee and my dog in the Cherokee National Forest in Tennessee

Conclusion – iKamper Review

With its unique design, the iKamper rooftop tent is a great addition to any camping setup. It’s one of the best, if not the best rooftop tent around. The durable construction, comfortable mattress and built-in ladder make it easy to use.

Whether you’re camping in the mountains, by the beach, or even at a rest stop on the Jersey turnpike (only once, I swear), you should consider the iKamper. I can definitely recommend it if you’re searching for a high quality, easy to use, rooftop tent.

Please note, I am not an affiliate of iKamper – I just really like my rooftop tent. Below is their website:

ikamper.com

If you love the idea of the outdoors and adventuring – perhaps renting an overlanding vehicle in Iceland is just what the doctor ordered. In addition to the stunning scenery, you’ve got to check out the food! 25 Greatest Icelandic Dishes You’ll Want to Feast On. The Fermented Shark is a real…treat.

JOIN OUR EMAIL LIST FOR THE BEST TRAVEL TIPS AND LATEST GEAR ESSENTIAL REVIEWS!

Exit mobile version